
Zoho Connection
A Zoho connection is the authorised link between your WordPress site and your Zoho account. Create it once in FormBridge for Zoho, and every feed you build afterwards can send form submissions to Zoho without you entering credentials again.
This guide shows how to create a Zoho connection: registering a client in the Zoho API console, copying the Client ID and Client Secret into FormBridge, choosing the correct data centre, and authorising the account.
What a Zoho connection gives you
One connection stores an authorised Zoho account and the Zoho applications that account is allowed to reach. When you later build a feed, you pick this connection instead of re-entering credentials. You can create more than one connection — for example, one per Zoho account or per data centre.
Zoho apps you can authorise
- Zoho CRM
- Zoho Bigin
- Zoho Books
- Zoho Desk
- Zoho Campaigns
- Zoho Marketing Automation
What you will need
- Zoho account
- Zoho API console access
- Client ID
- Client Secret
- Redirect URI
- Data centre
Before you start
Check these three things before you open the Zoho API console.
How to create a Zoho connection
The six steps below move between two browser tabs: your WordPress admin and the Zoho API console. Keep both open — you will copy values in each direction.
Step 1: Open the FormBridge Connections page
WordPress admin › FormBridge › ConnectionsLog in to your WordPress admin dashboard. In the left sidebar, open the FormBridge menu and click Connections.
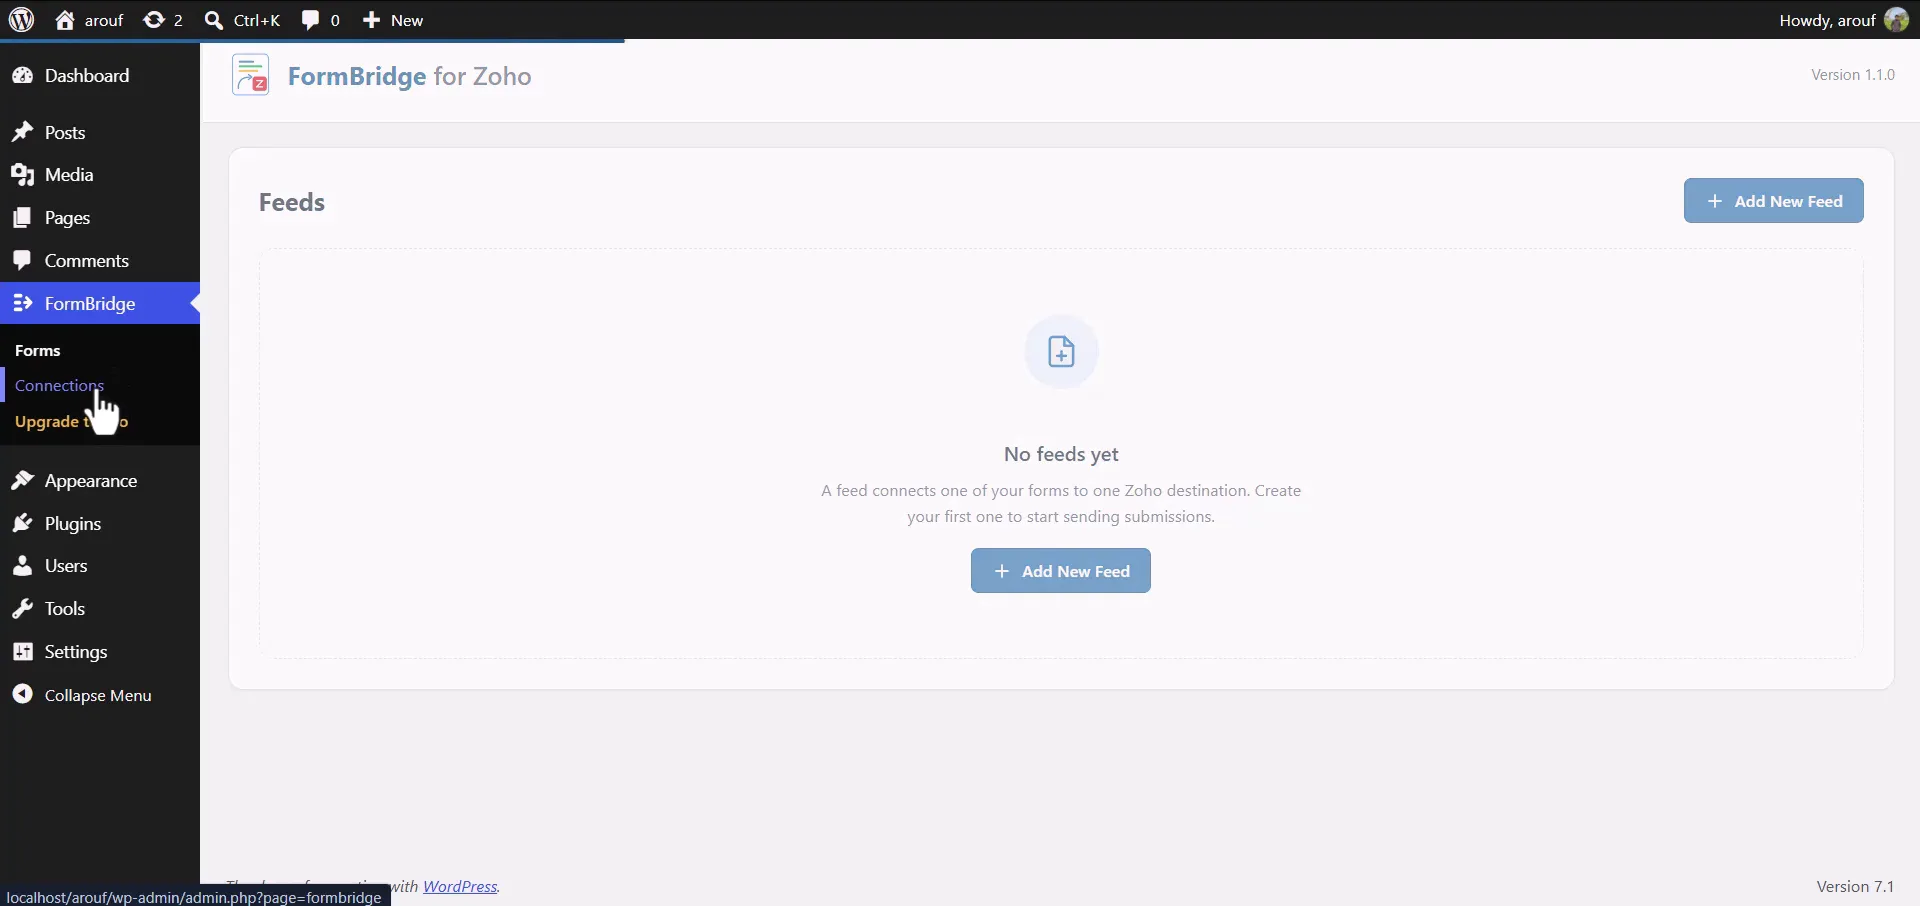
Opening Connections from the FormBridge menu in WordPress. The first time you open this page it is empty, and a single Create Connection button is shown.
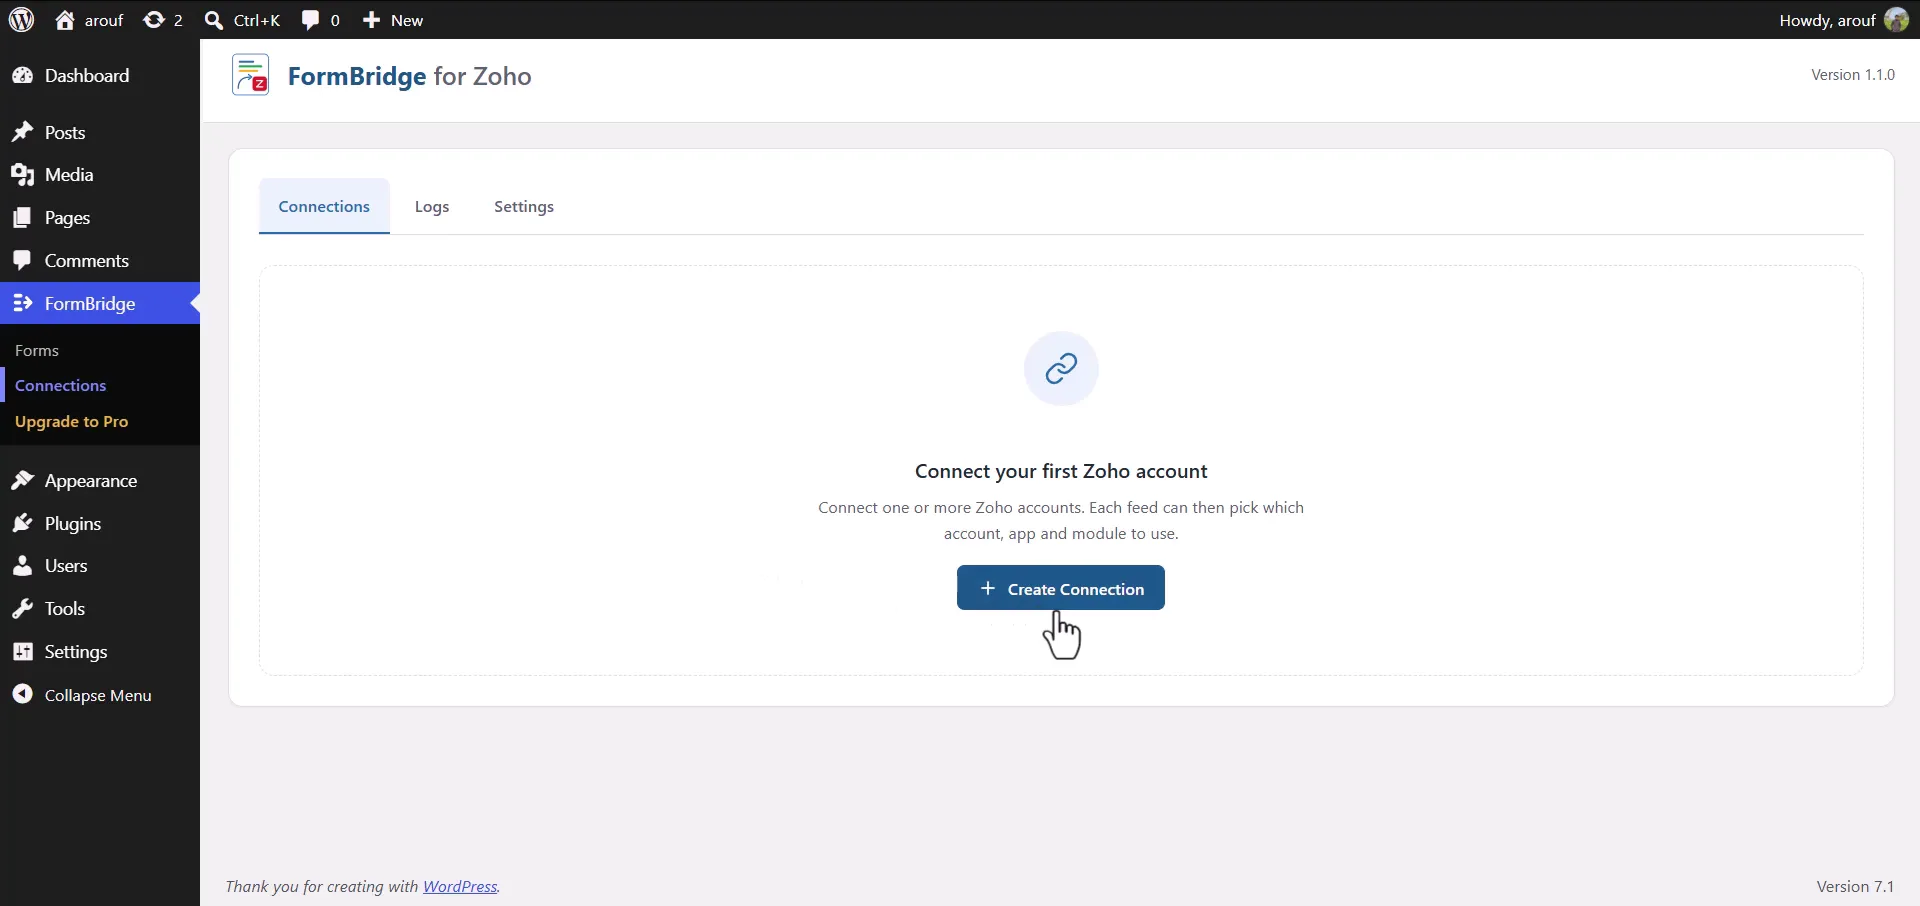
The Connections page before any Zoho account is authorised. Step 2: Start a new connection
Connections › Create ConnectionClick Create Connection. A pop-up opens showing the Redirect URI you will need in the Zoho API console, along with fields for Label, Data Center, Authorized For, Client ID and Client Secret.
Leave this pop-up openThe redirect URI shown here is specific to your site’s domain. You will copy it into Zoho in the next step, then come back to this same pop-up to paste your credentials.
Inside the pop-up, find the link to the Zoho API console and open it — it loads in a new browser tab.
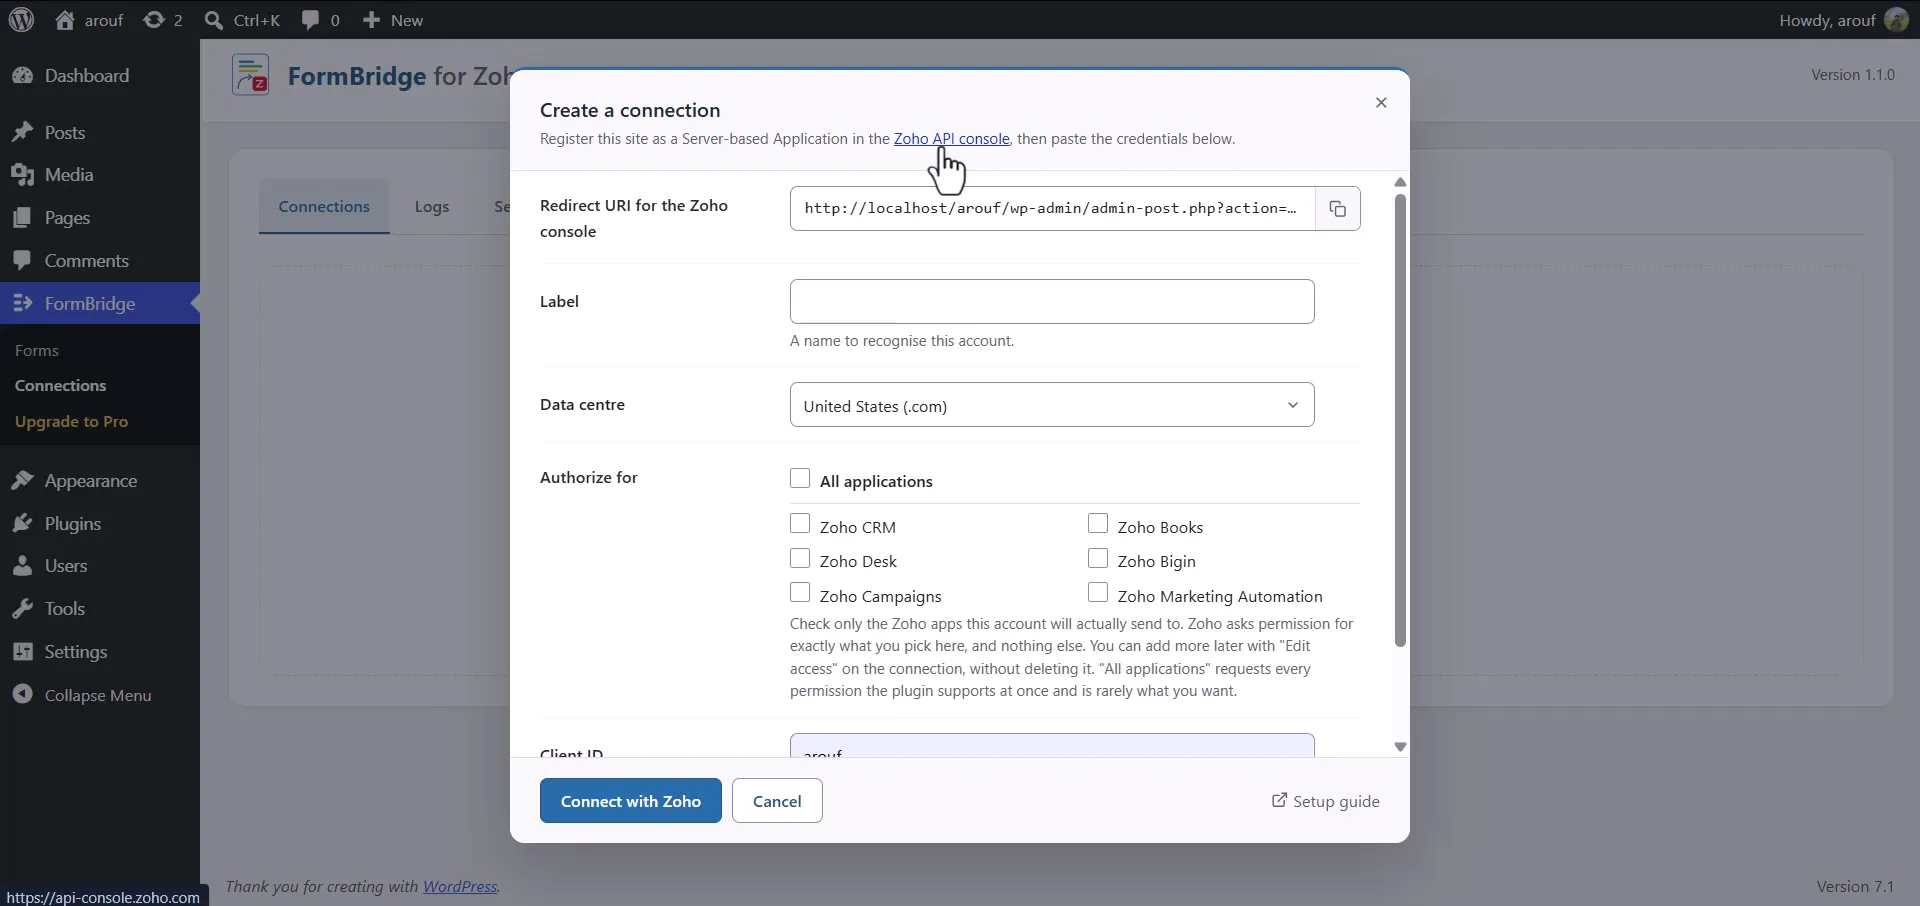
The Create Connection pop-up, with the redirect URI and the link to the Zoho API console. Step 3: Create a client in the Zoho API console
Zoho API console › Add ClientIn the Zoho API console tab, click Add Client.
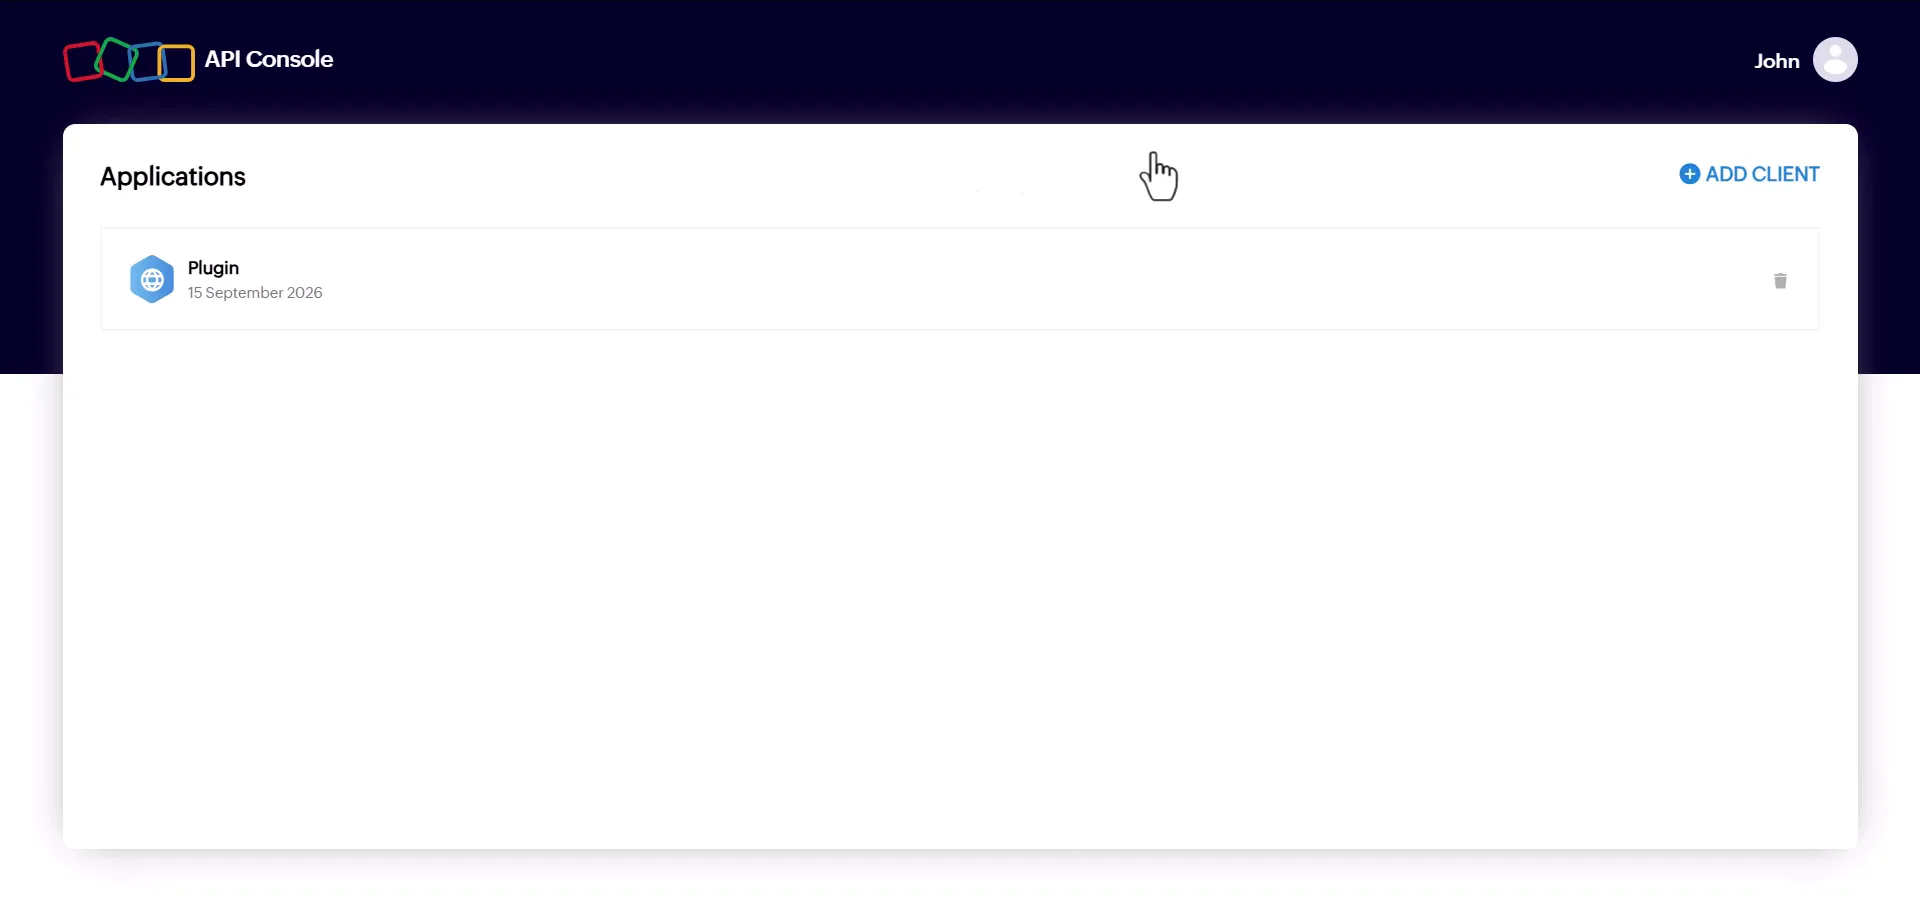
Starting a new client in the Zoho API console. When Zoho asks for the application type, choose Server-based Applications.
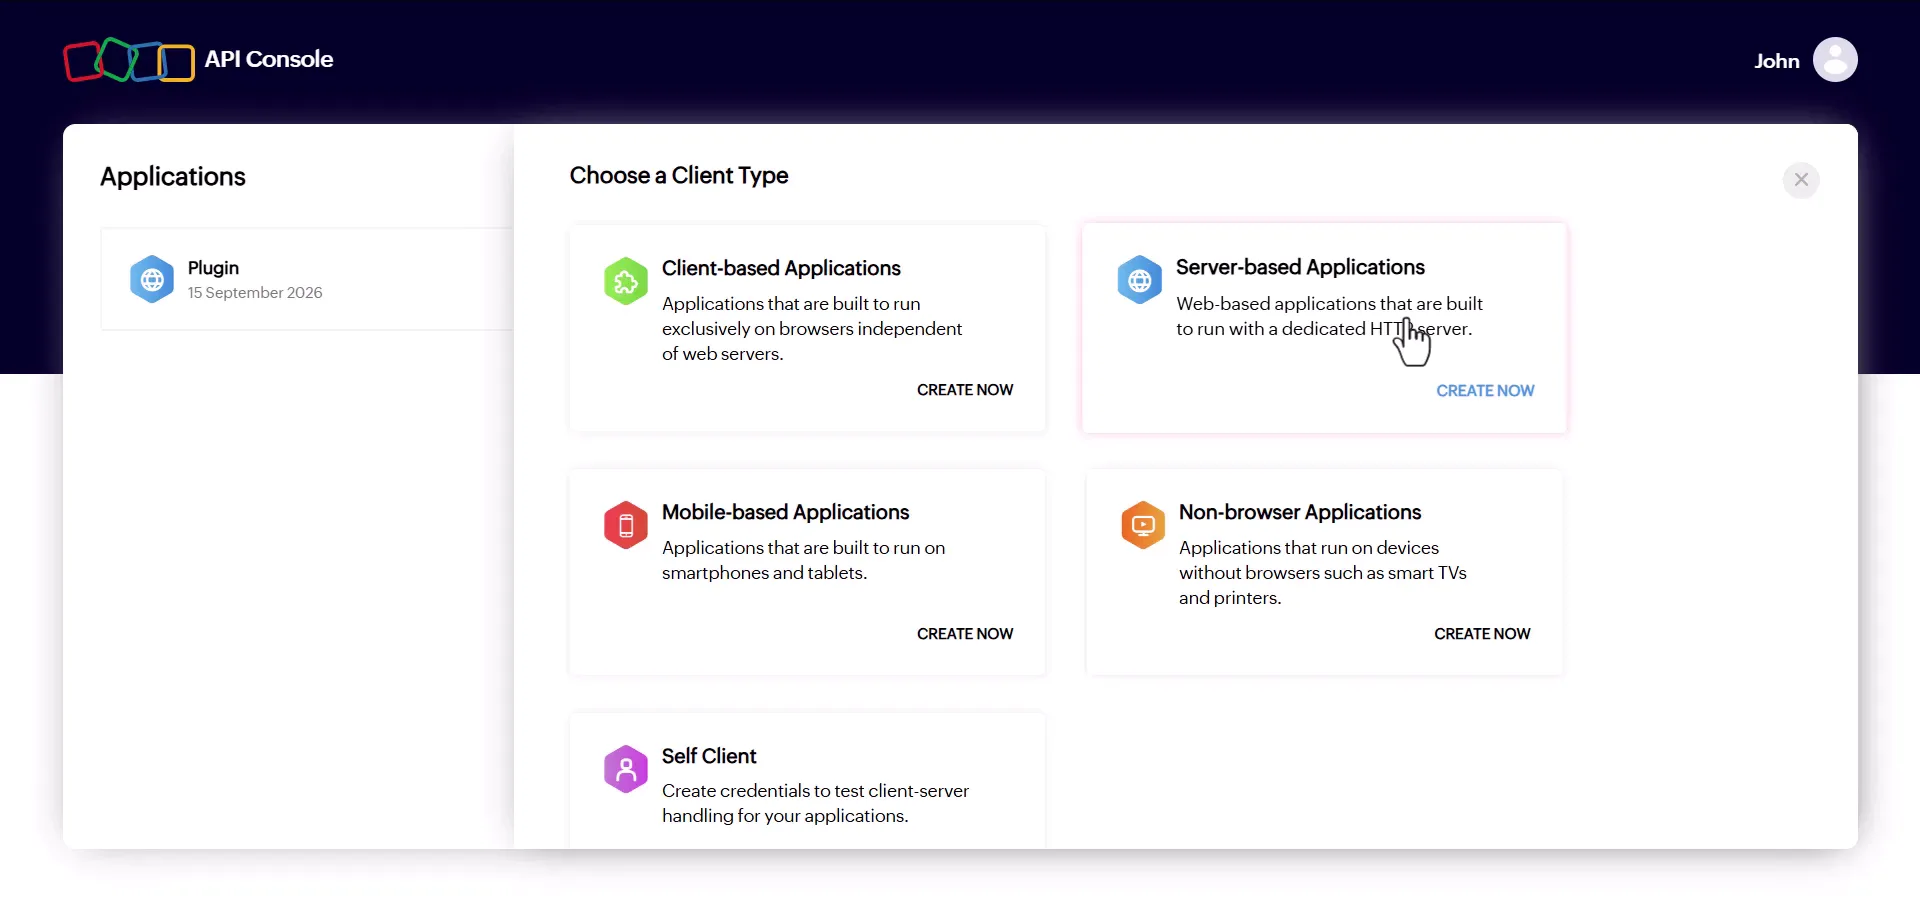
FormBridge runs on your server, so Server-based Applications is the correct client type. Fill in the client details:
- Client Name — any name that helps you recognise this client later.
- Homepage URL — your website’s homepage URL, copied from your browser.
- Authorized Redirect URI — the redirect URI from the FormBridge pop-up in Step 2. Copy it exactly; it is specific to your domain.
Save the client. Zoho then displays your Client ID and Client Secret. Copy both.
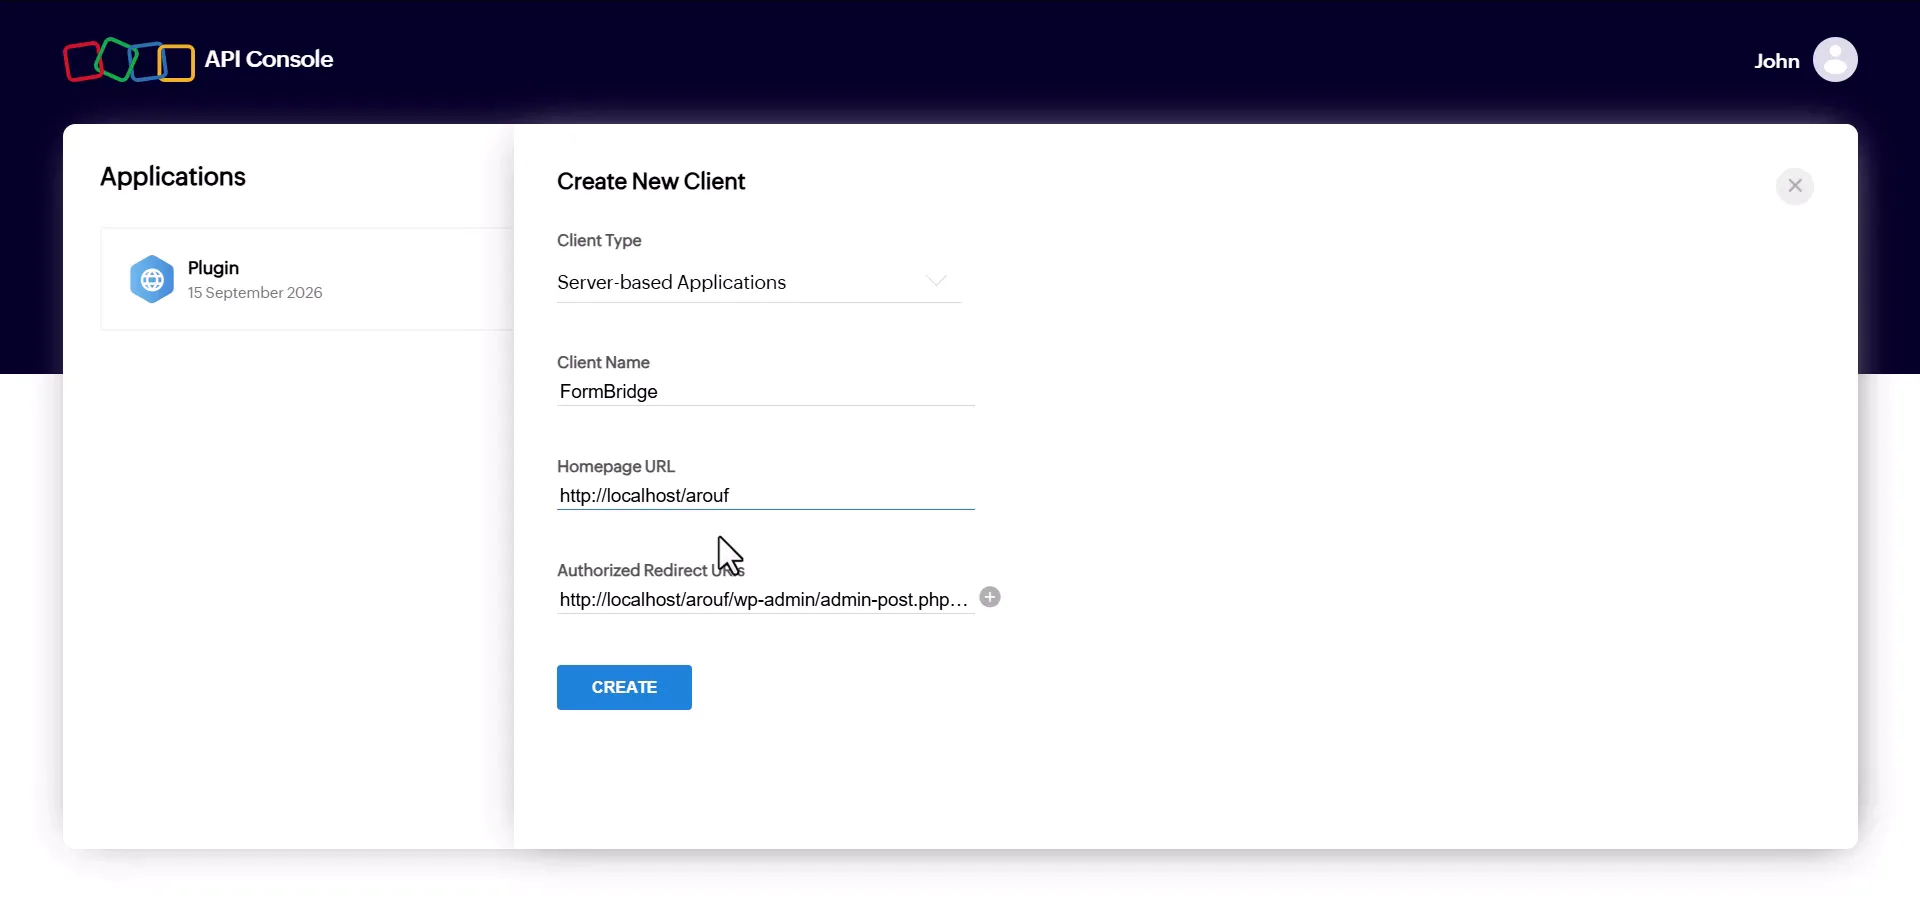
The Client ID and Client Secret generated for your new Zoho client. Treat the Client Secret like a passwordAnyone holding both values can request access to your Zoho account. Do not paste them into a public page, a support ticket or a shared document.
Step 4: Enter your Zoho credentials in FormBridge
Create Connection › Connection settingsSwitch back to the FormBridge pop-up in WordPress and complete the remaining fields.
- Paste the Client ID and Client Secret you copied from the Zoho API console.
- Enter a meaningful Label so you can identify this connection later, for example Zoho CRM Main Connection.
- Select the Data Center that matches your Zoho account. In the example,
.comis selected. - Under Authorized For, choose which Zoho applications this connection may access: All applications, or a single app such as Zoho CRM if you only want to send data there.
Then click Connect with Zoho.
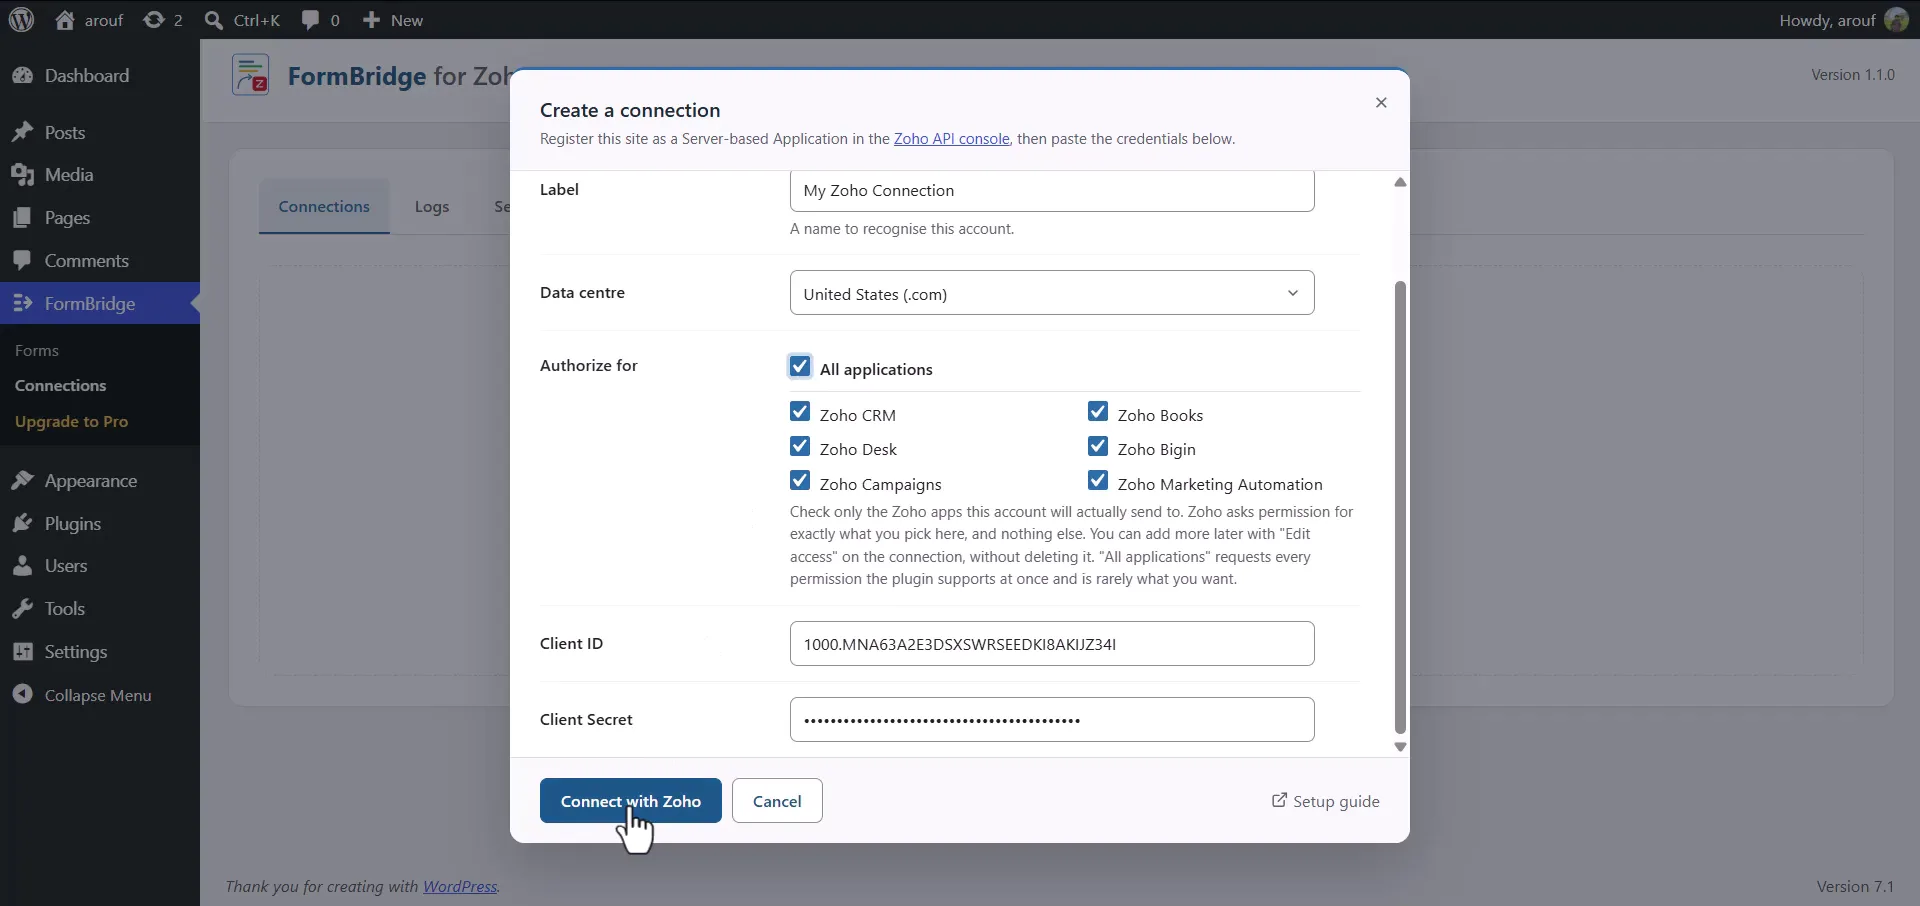
The completed connection settings, ready for authorisation. Match the data centre to the accountZoho runs separate data centres, each on its own domain —
.com,.eu,.in,.com.au,.jpand others. Your credentials only work in the data centre where the account was created. Check the domain you see when signed in to Zoho, or Zoho’s multi-DC documentation, if you are unsure.Step 5: Accept the Zoho terms and authorise access
Zoho authorisation pageA Zoho authorisation page opens. Scroll down the page.
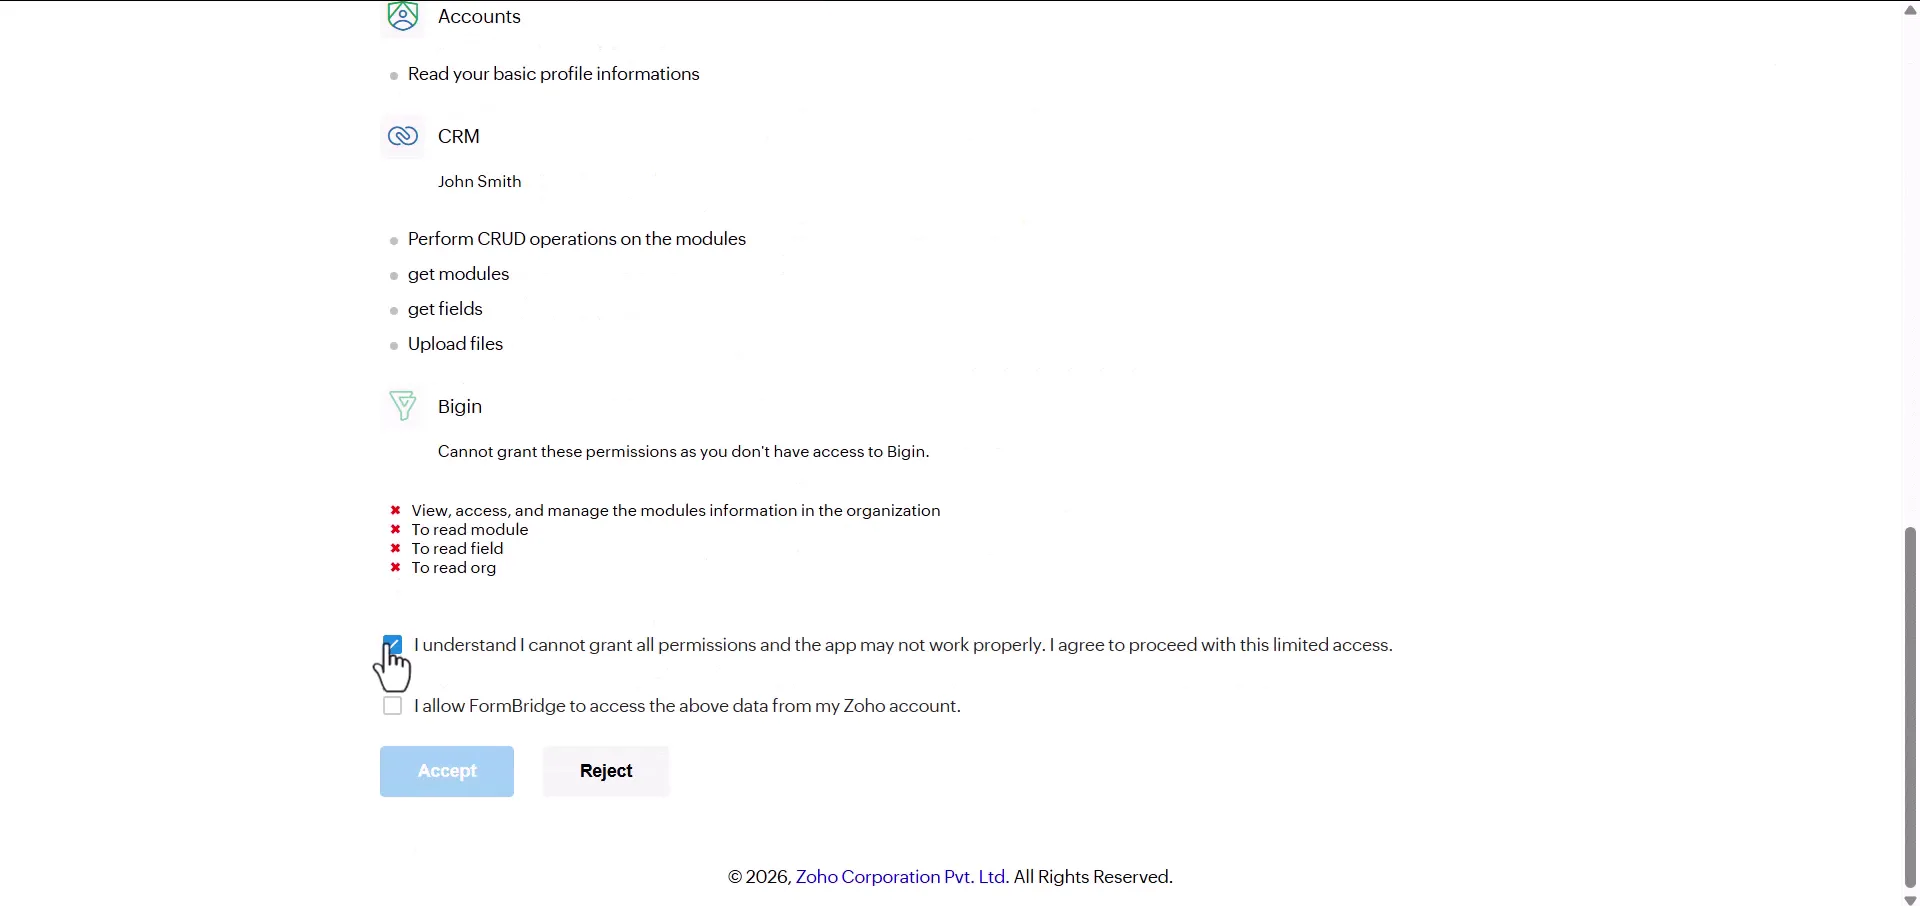
The Zoho authorisation page for the client you created. Tick the two checkboxes to accept the terms and conditions.
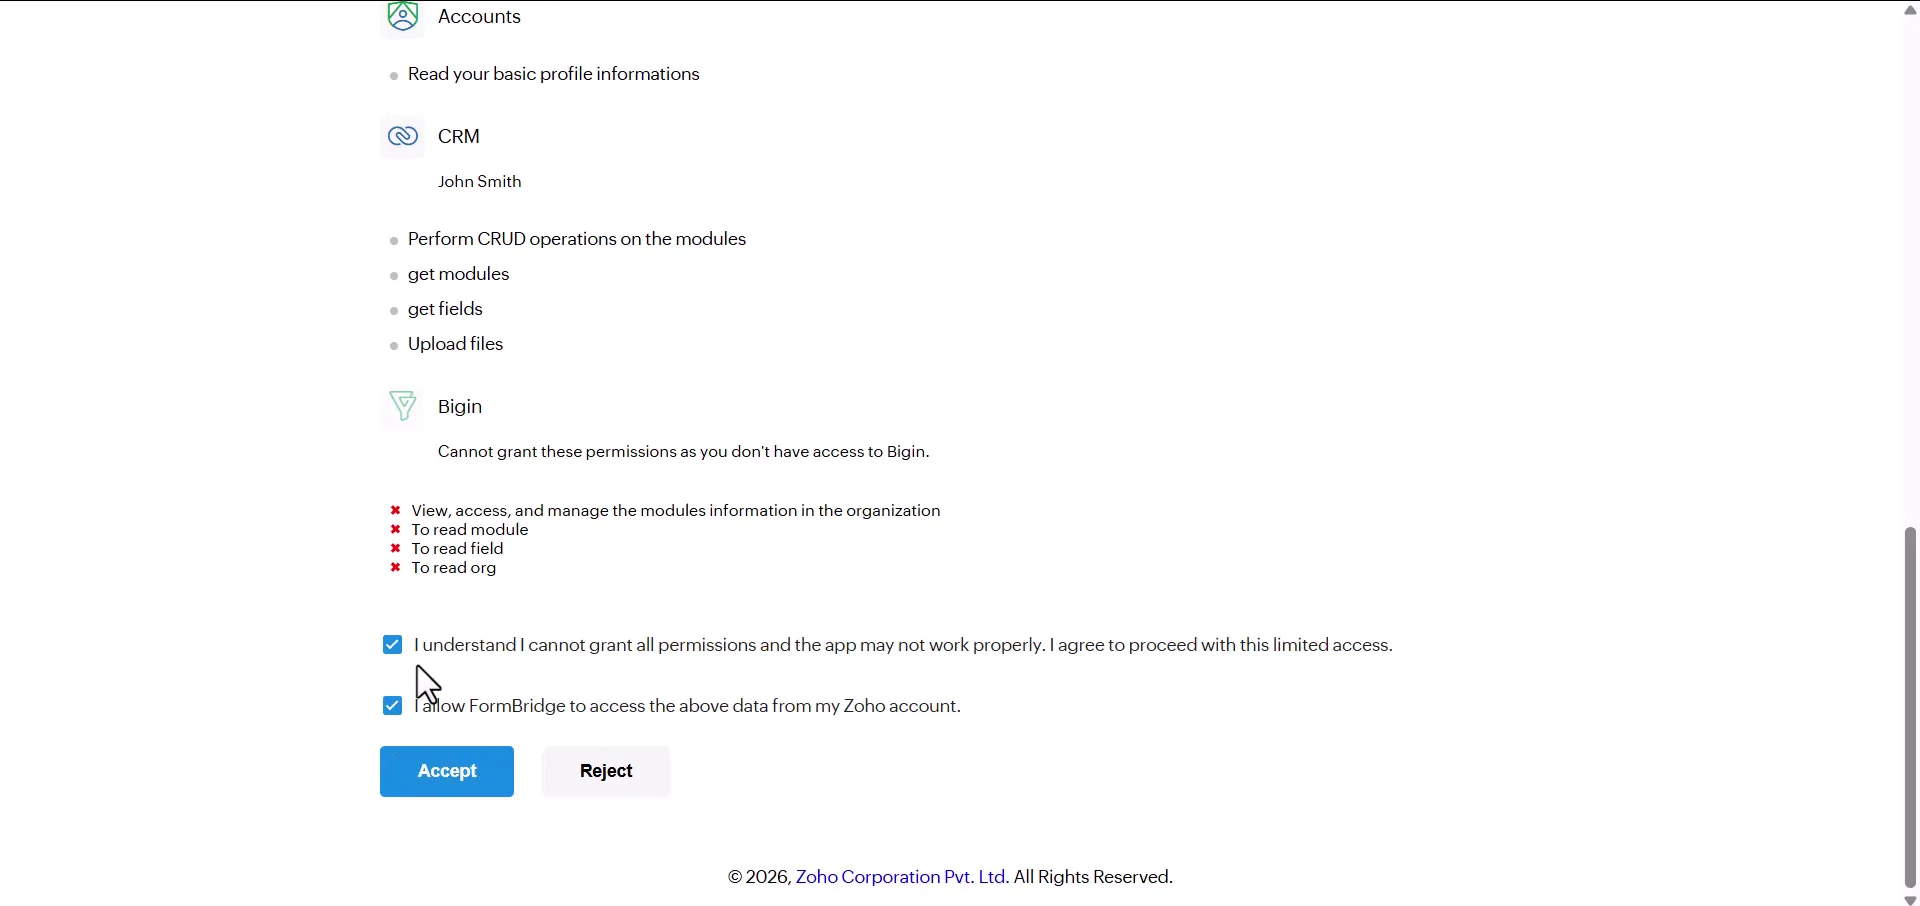
Both checkboxes must be ticked before Zoho will grant access. 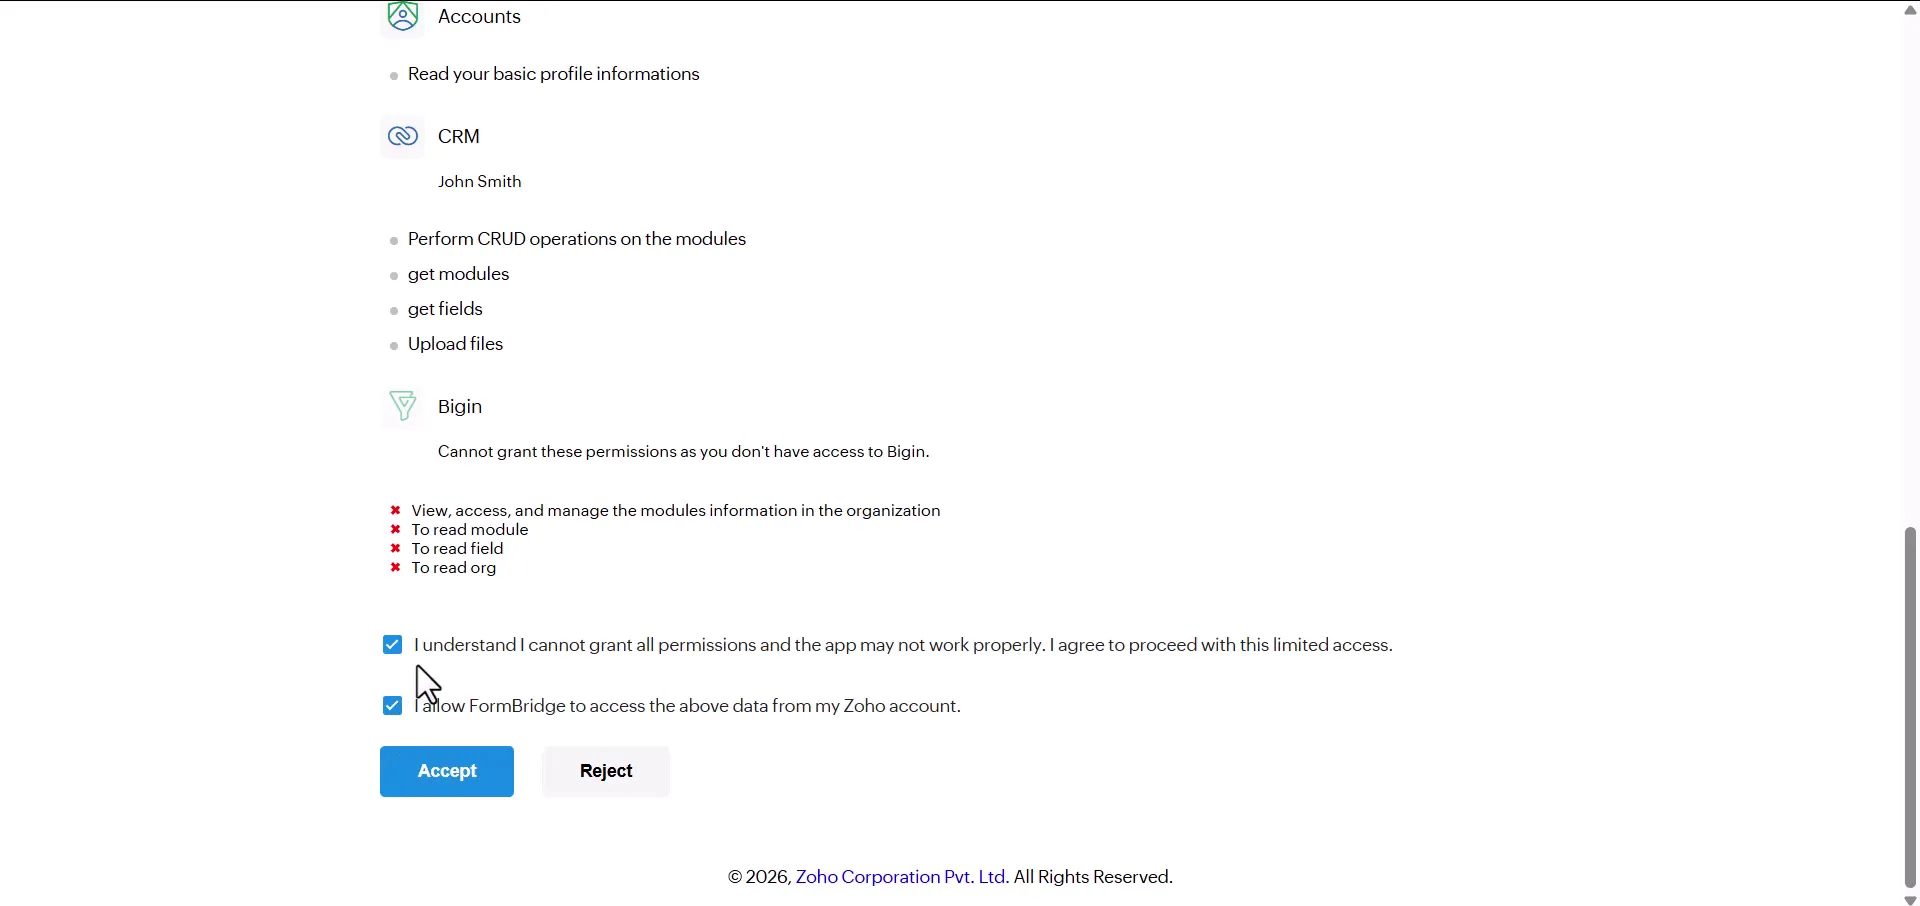
The second checkbox, ticked. Click Accept to grant access.
Zoho redirects you back to WordPress, and the connection status changes to Connected along with the connection details.
Step 6: Verify the connection
Connections › Connection detailsOn the connection details page you can view the modules and fields available from Zoho. If they load, the connection is working.
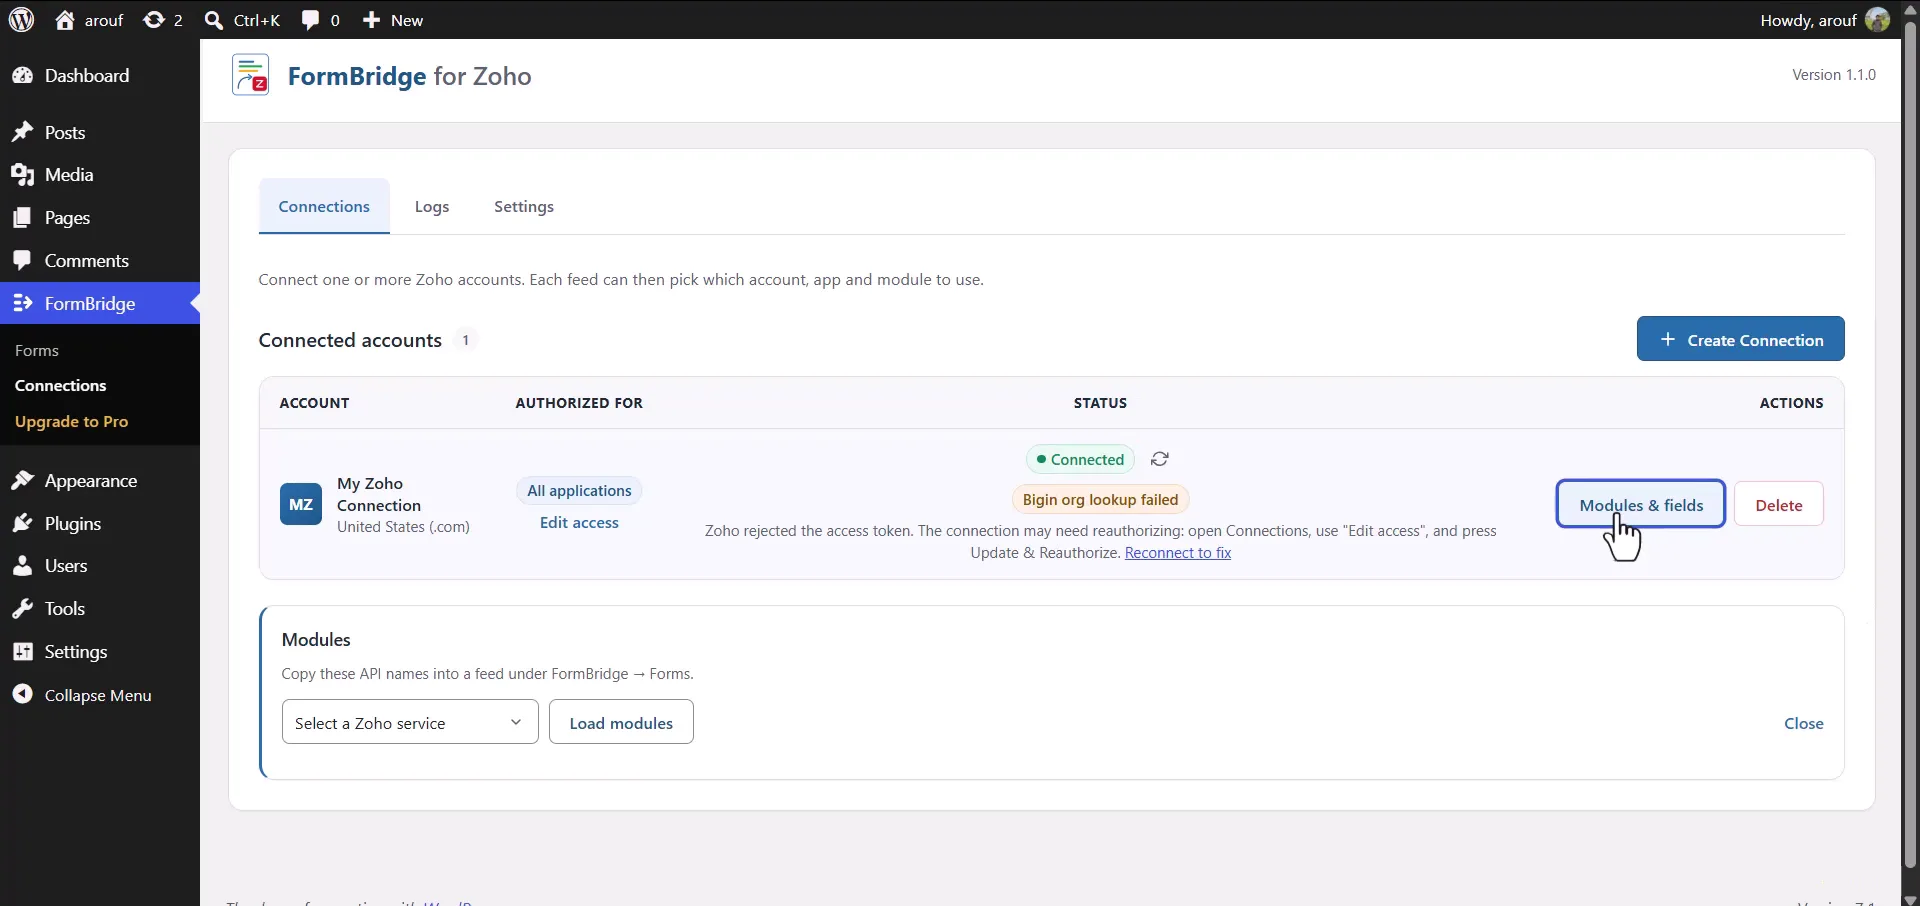
Modules returned by Zoho for the connected account. Run a quick check by loading the fields for a module and confirming the data comes back correctly.
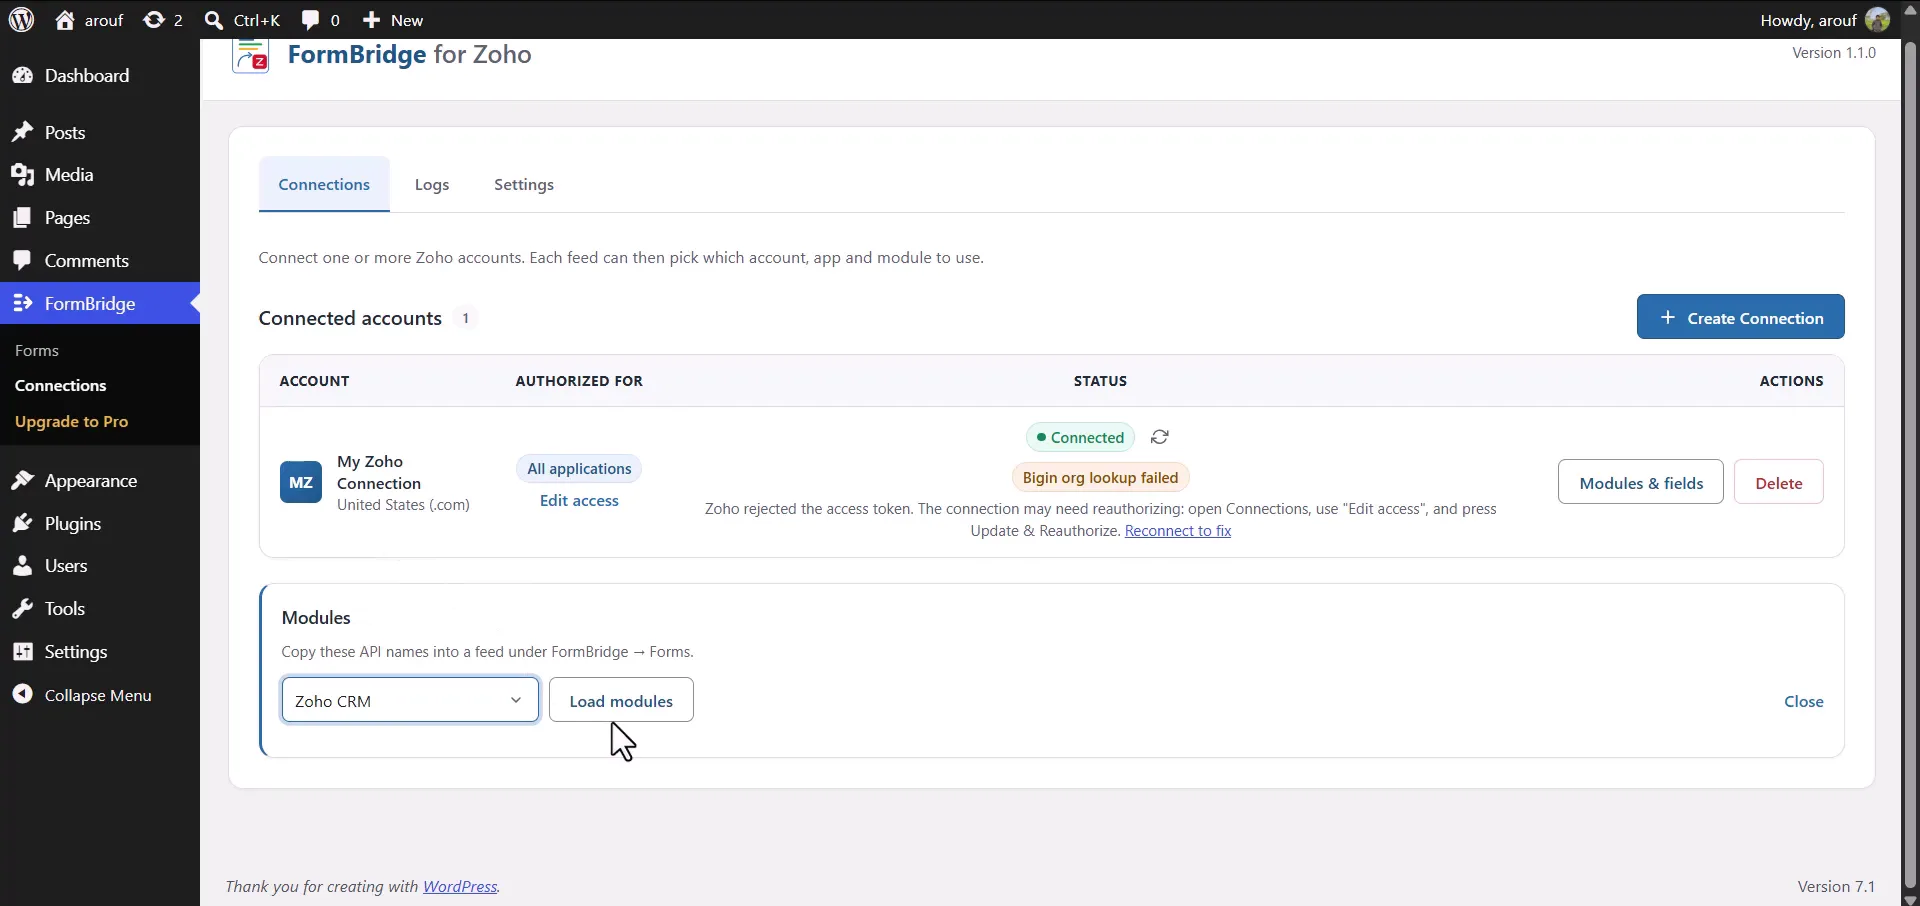
Fields loaded from Zoho confirm that the connection is authorised correctly. You can add more fields as needed and use this connection in your forms. To add another connection — for a different Zoho account or a different configuration — click Create Connection again and repeat the same process.
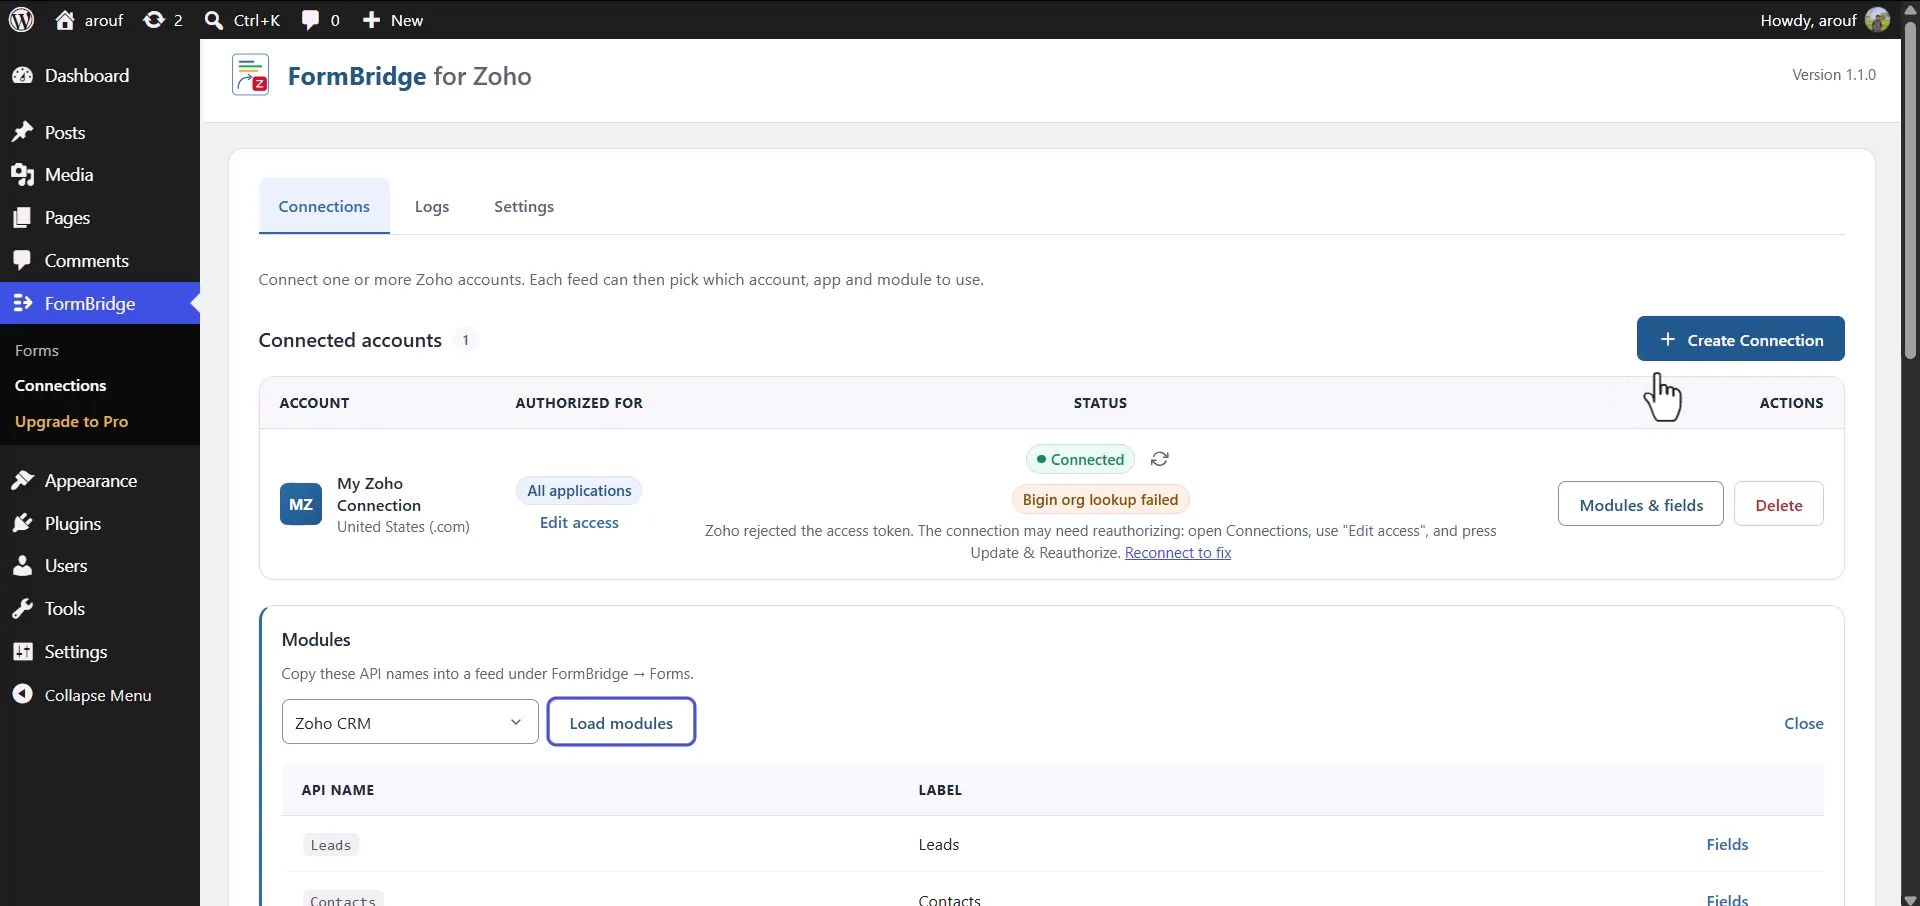
The Connections list, where you can add further Zoho accounts. Next stepWith the connection in place, build a feed: choose a form as the trigger, then pick a Zoho destination — for example the WordPress to Zoho CRM integration guide.
Troubleshooting a Zoho connection
Find the symptom on the left, apply the fix on the right.
Invalid redirect URI
- Likely cause
- The Authorized Redirect URI in the Zoho API console does not match the one shown in the FormBridge pop-up.
- How to fix it
- Copy the redirect URI from the pop-up again and paste it into the Zoho client. It must match character for character, including
https, the domain and any trailing slash.
Invalid client credentials
- Likely cause
- The Client ID or Client Secret was copied with a missing character or a trailing space, or it belongs to a different Zoho client.
- How to fix it
- Reopen the client in the Zoho API console, copy both values again and paste them into the FormBridge pop-up.
Wrong data centre
- Likely cause
- The Data Center selected in FormBridge is not the one where the Zoho account was created.
- How to fix it
- Check the domain you see when signed in to Zoho, then select the matching data centre. Credentials created in one data centre will not authorise in another.
Wrong client type
- Likely cause
- The Zoho client was created as something other than a server-based application, so it does not accept the redirect URI.
- How to fix it
- Create a new client in the Zoho API console and select Server-based Applications, then use the new Client ID and Client Secret.
Modules and fields do not load
- Likely cause
- The connection was authorised for a narrower set of apps than the one you are trying to use.
- How to fix it
- Check the Authorized For setting on the connection. If it was limited to a single app, create a connection authorised for the app you need, or for all applications.
No FormBridge menu in WordPress
- Likely cause
- The plugin is not activated, or your user role cannot see plugin menus.
- How to fix it
- Open Plugins in the WordPress admin and confirm FormBridge for Zoho is active, then sign in as an administrator.
Still stuck? Send the details to support@techwavesolutions.net.
Frequently asked questions
Why do I need a client in the Zoho API console?
Zoho issues the Client ID and Client Secret that identify your site when it asks for access. FormBridge uses those credentials, plus the redirect URI, to complete the authorisation and store the connection. Without a client, Zoho has nothing to authorise.
Which application type should I choose in Zoho?
Select Server-based Applications. FormBridge runs on your WordPress server and sends requests from there, so this is the client type that accepts the redirect URI shown in the plugin.
Where do I find the redirect URI?
It is shown at the top of the Create Connection pop-up in FormBridge. The URI is built from your own site’s domain, so do not copy one from another site or from a screenshot.
Can I create more than one Zoho connection?
Yes. Click Create Connection again and repeat the process for each Zoho account or configuration you need. Give each one a clear label, because you select the connection by its label when you build a feed.
What does the Authorized For setting control?
It sets which Zoho applications the connection is allowed to reach. Choose All applications to keep every supported Zoho app available, or restrict it to a single app such as Zoho CRM if that is the only destination you intend to use.
What happens if my site domain changes?
The redirect URI is tied to your domain, so it changes with the site. Open the FormBridge Create Connection pop-up to read the new redirect URI, add it to the client in the Zoho API console, and authorise the connection again.
