Ninja Forms Zoho Integration: Connect Forms with FormBridge for Zoho
A Ninja Forms Zoho integration lets you automatically send WordPress form submissions to your Zoho apps without manually copying data. With FormBridge for Zoho, you can use Ninja Forms as the trigger and send captured form data to Zoho CRM, Zoho Books, Zoho Desk and other supported Zoho applications.
This guide explains how to select Ninja Forms as a trigger, choose your form and capture submission data before configuring your Zoho Action.
What is Ninja Forms?
Ninja Forms is a WordPress form builder that allows users to create professional forms using a drag-and-drop interface. FormBridge for Zoho connects Ninja Forms submissions with Zoho applications, allowing form data to be automatically sent to Zoho without manual data entry.
Before you start.
Before setting up the integration, make sure:
- Ninja Forms is installed and activated.
- You already created at least one Ninja Form.
- Your required Zoho account is connected under FormBridge for Zoho → Connections.
Once these are ready, you can create your integration feed.
How to set up Ninja Forms integration with FormBridge for Zoho.
Step 1: Create a new integration feed.
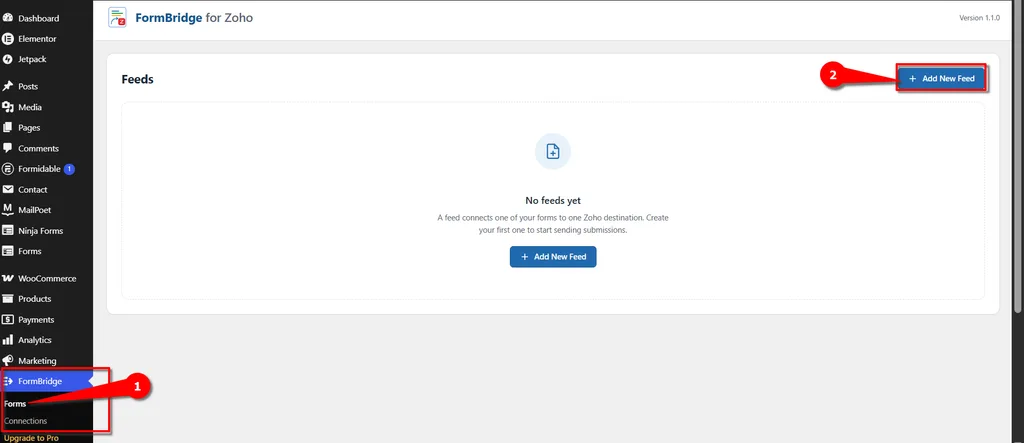
Go to your WordPress dashboard and open FormBridge for Zoho. Now click on Forms, and then + Add New Feed.
Step 2: Select Ninja Forms as the trigger.
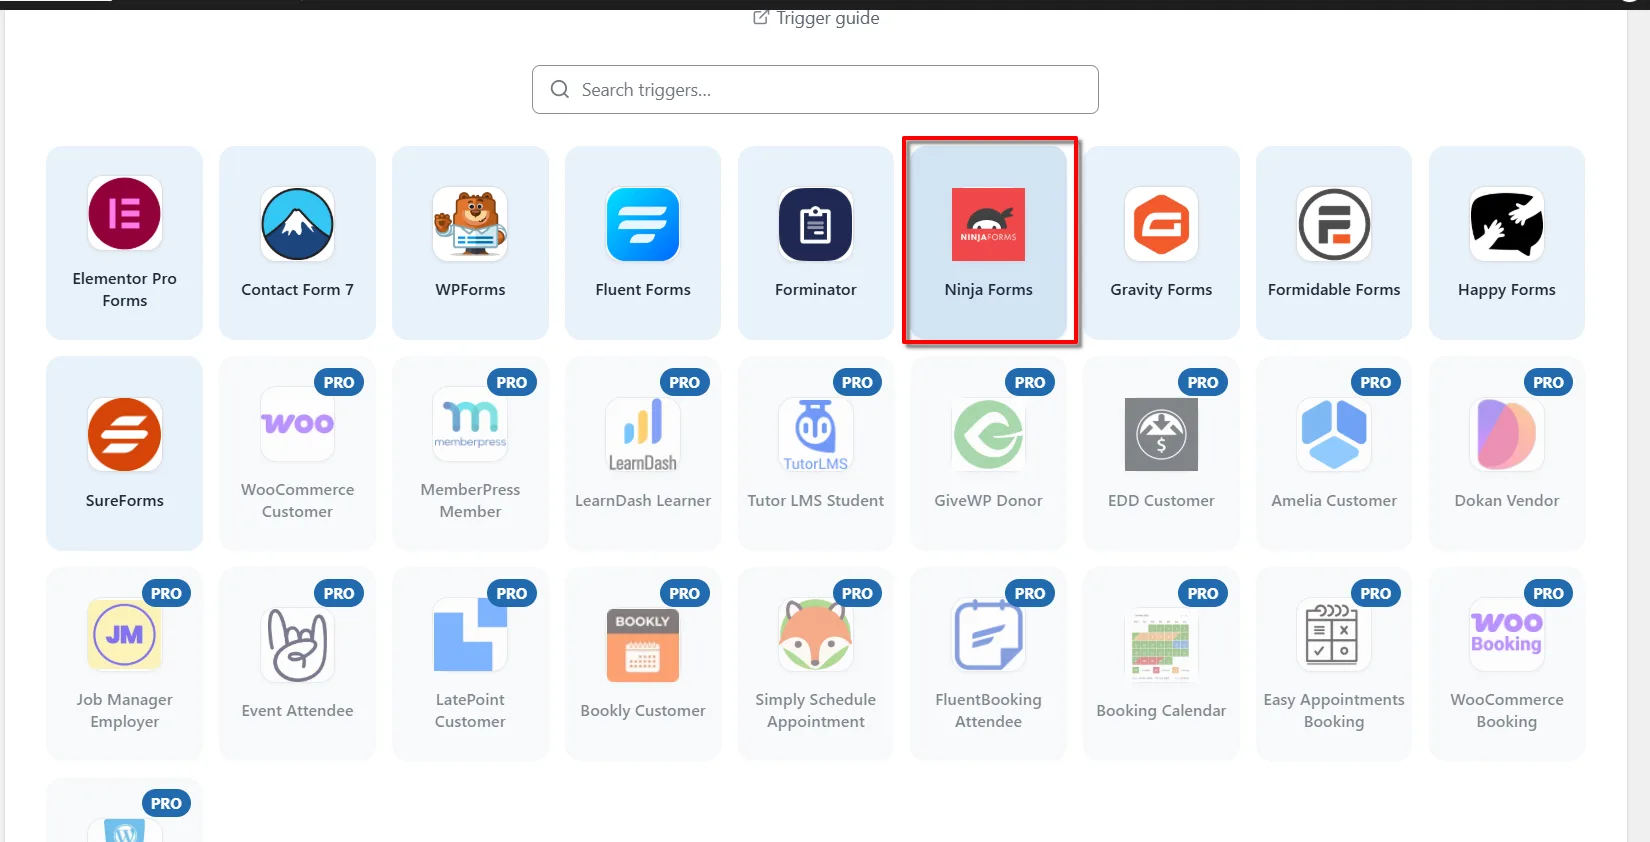
From the available trigger apps, select Ninja Forms.
This tells FormBridge for Zoho that the integration should run whenever the selected Ninja Forms form is submitted.
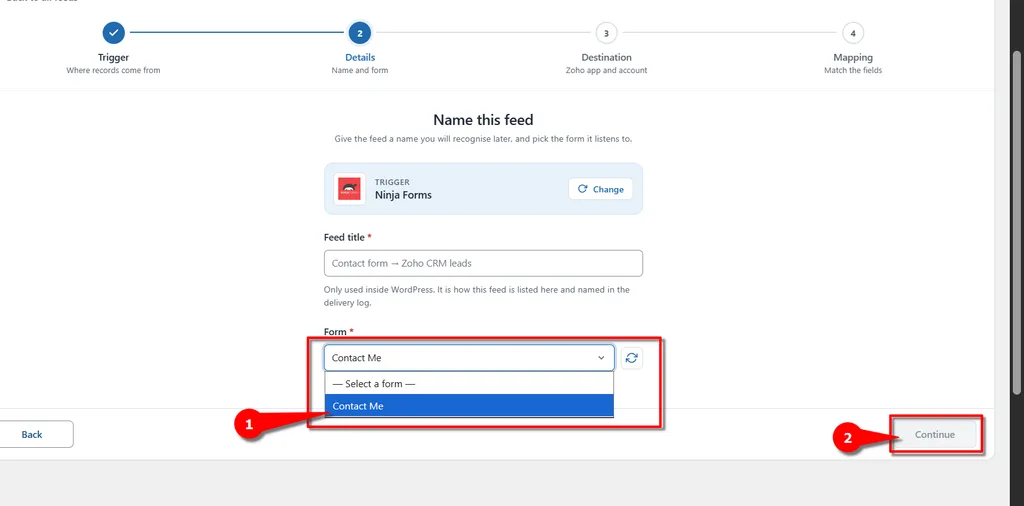
Step 3: Put Your Feed title.
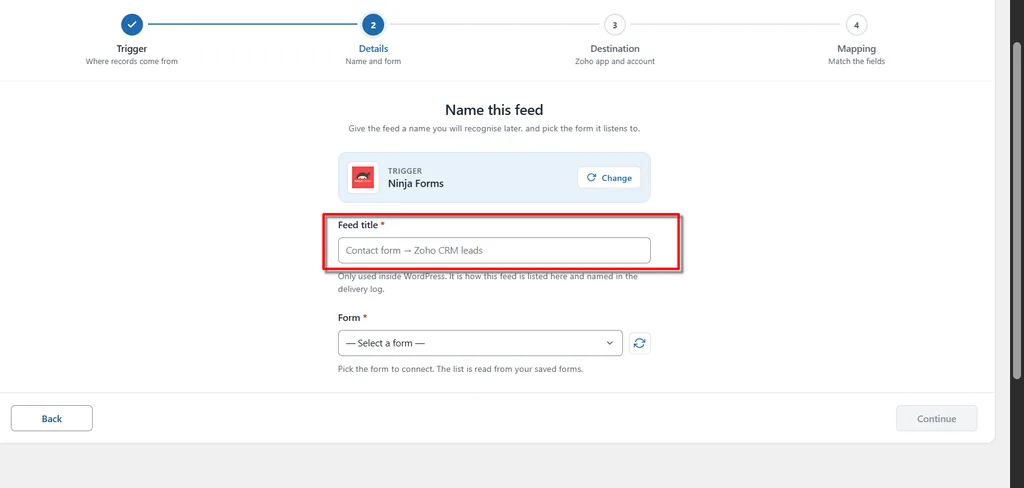
Fill in the necessary information and put your desired name in Feed title.
Step 4: Select your Ninja Forms form.
Now you can see the form list in the form dropdown. Select the form that you want to use for sending data to zoho, for example Contact Me and then click Continue.
 Info
Info
After completing these steps, go to the Action section. Here, you will find several required fields. Select and fill in each field according to your requirements.
A Connection is required to use this Action. If you have not created a Connection yet, you must create and authorize one before proceeding to the next step.
Need help creating a connection?
Click Here to Create and Authorize a Connection →
