
WPForms Zoho Desk Integration: Connect and Create Customer Automatically.
WPForms is the best AI-powered WordPress forms plugin, trusted by over 6,000,000+ users. Easily create powerful WordPress forms with our AI + drag & drop online form builder.
FormBridge for Zoho is a handy WordPress plugin that lets you connect WPForms to Zoho Desk without coding. You can link up any of ten popular form plugins, including Elementor Forms, Contact Form 7, WPForms, and Gravity Forms, with six Zoho apps: Zoho CRM, Zoho Bigin, Zoho Books, Zoho Desk, Zoho Campaigns, and Zoho Marketing Automation.
In this guide, we’ll show you how to use WPForms as a trigger, and send every new submission into Zoho Desk as a Lead automatically.
Setup WPForms Integrations With Zoho Desk
First, go to your FormBridge for Zoho dashboard, click on Forms, and then + Add New Feed.
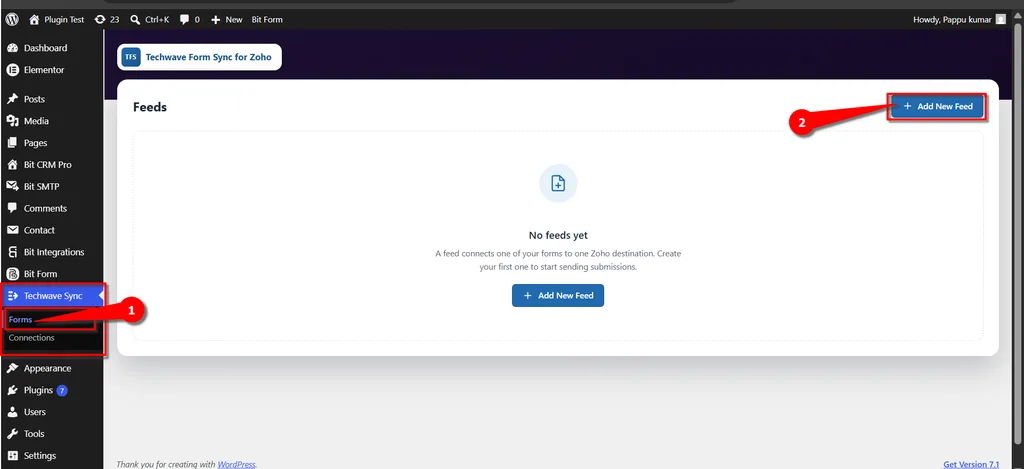
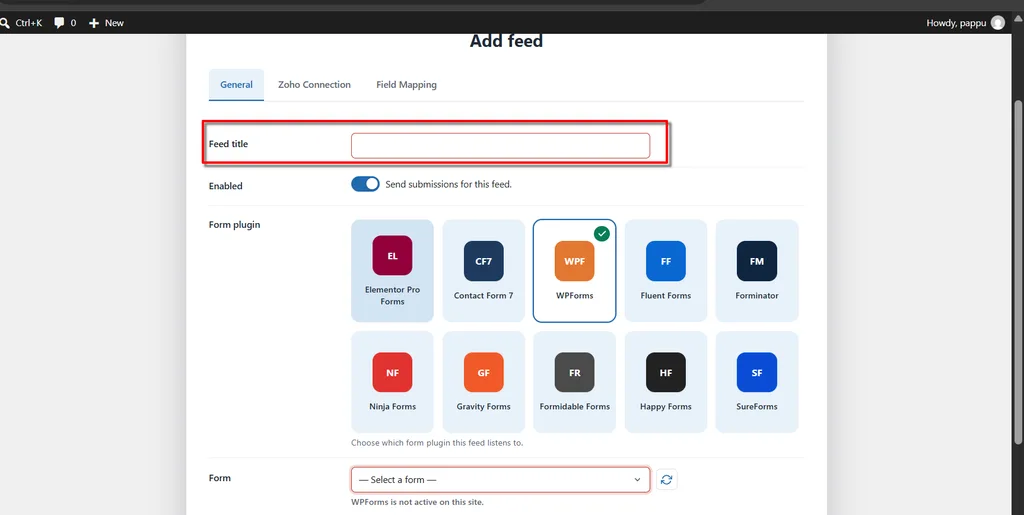
On the add feed screen, fill in the necessary information. Put your desired name in Feed title.
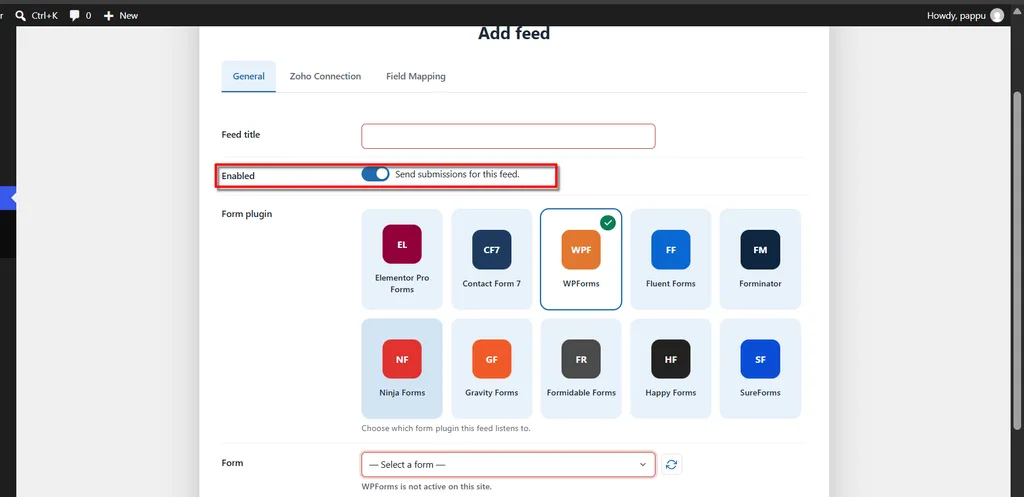
Then you need to make sure Enabled (Send Submissions for this feed) is turned on.
 Note
Note
If this option is disabled, submission data from the selected form will not be sent to Zoho.
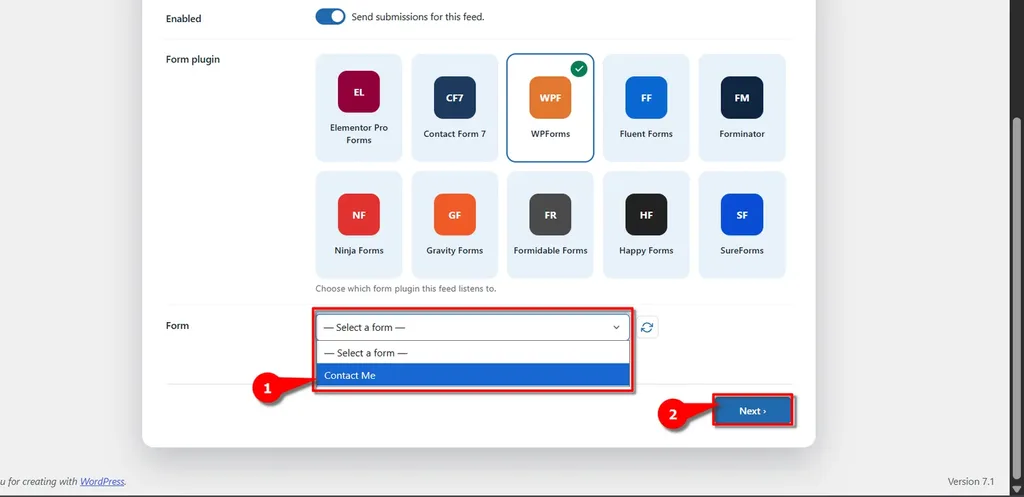
After that, the most important thing is to select your trigger. In this case, we are selecting WPForms.
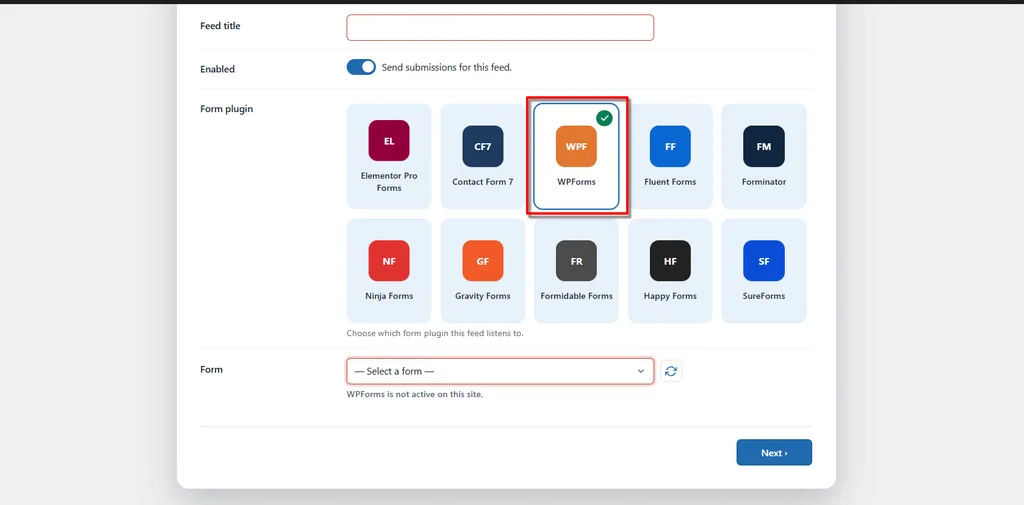
Once you select the trigger, you can see the form list in the form dropdown. Select the form that you want to use for sending data to Zoho Desk, for example Contact Me and then click Next.
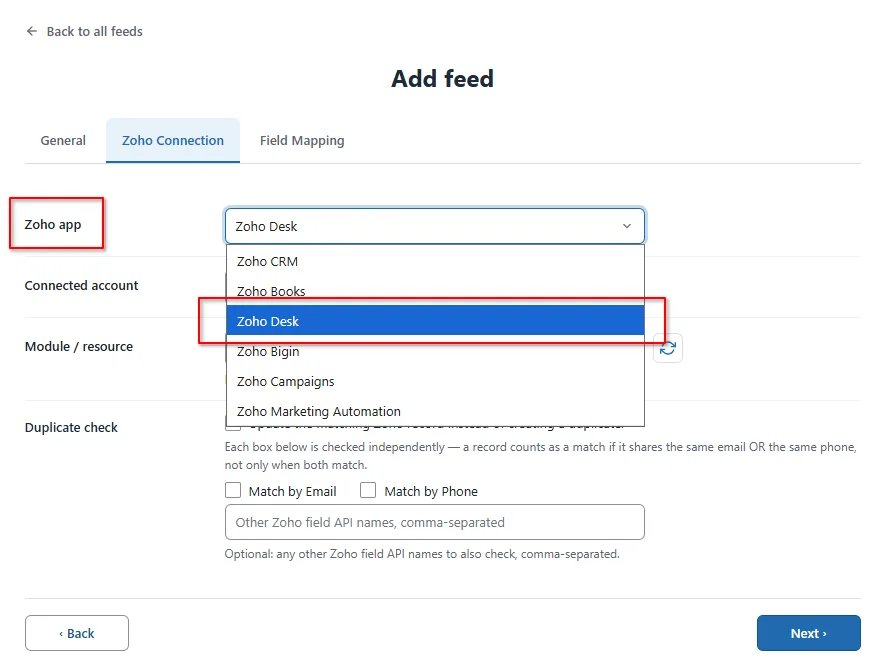
You’ll now arrive on the Zoho Connection tab. Here, first select Zoho app from the dropdown menu select Zoho Desk.
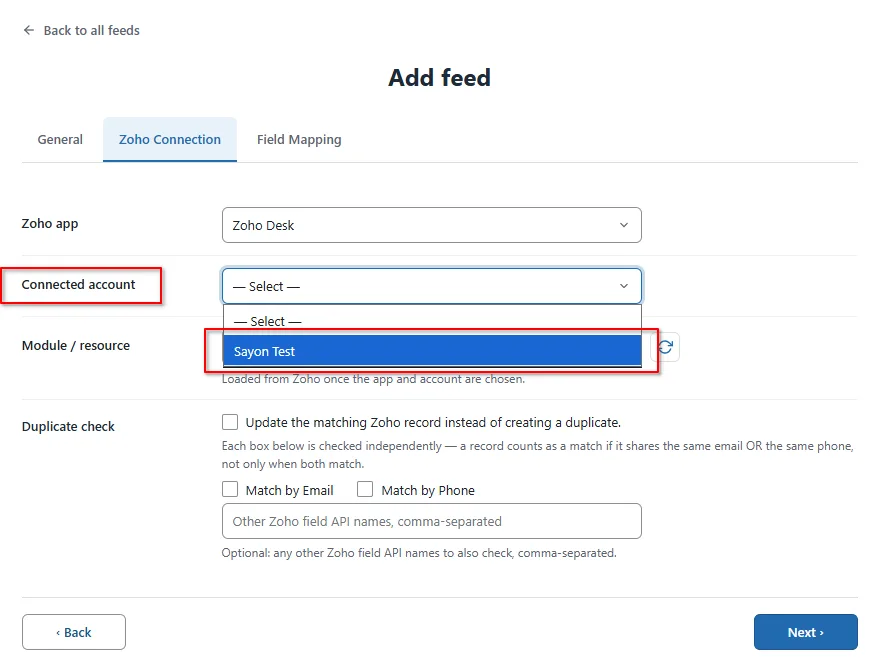
Now select the Connected account that you have already created. If you haven’t created one yet, set that up first under FormBridge for Zoho → Connections.
Click Here How to Create connections →
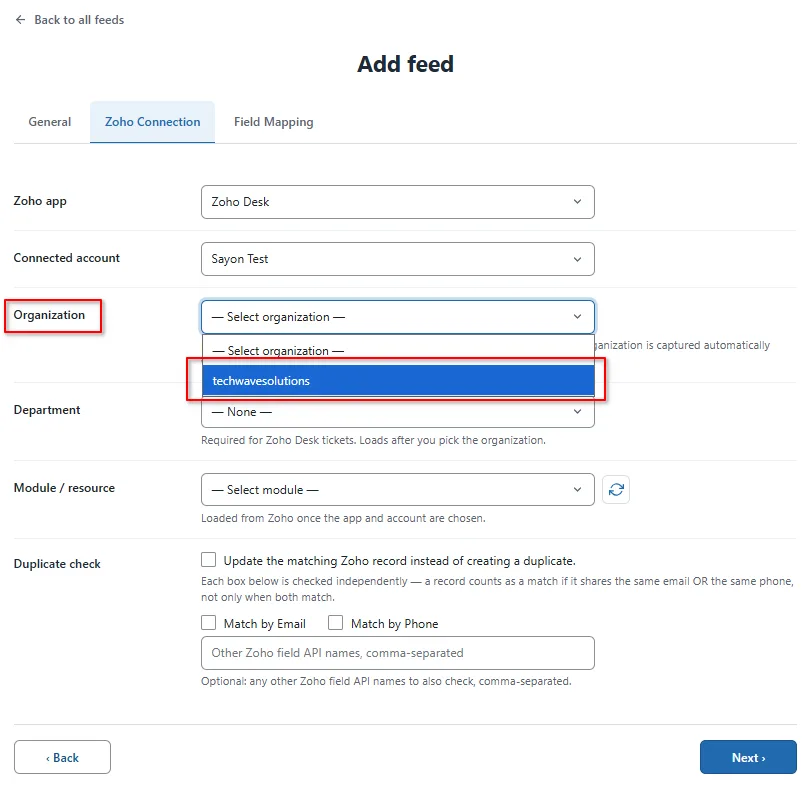
From the Organization dropdown menu, select your preferred organization.
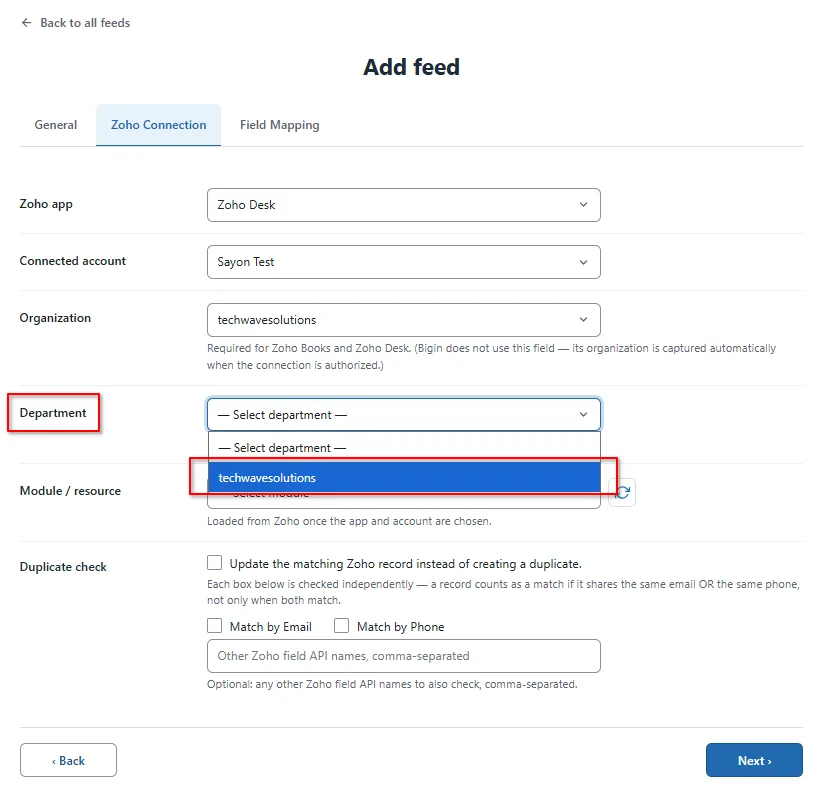
From the Department dropdown menu, select the specific department ,where you want to route and assign the incoming tickets or contacts in Zoho Desk.
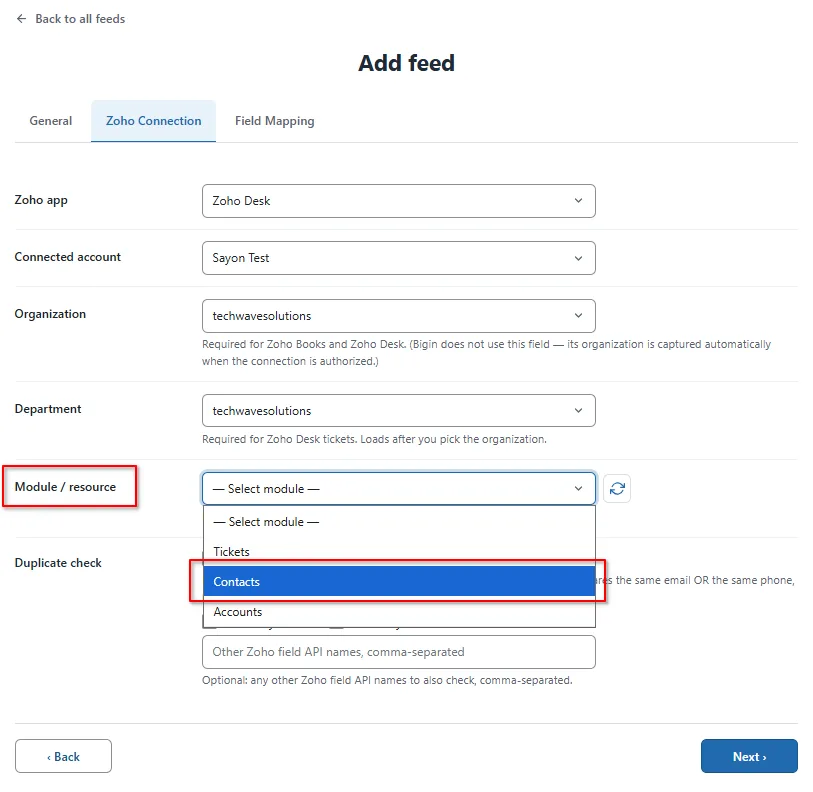
From the Module / resource dropdown menu, select the module where you want to send your form submission data.
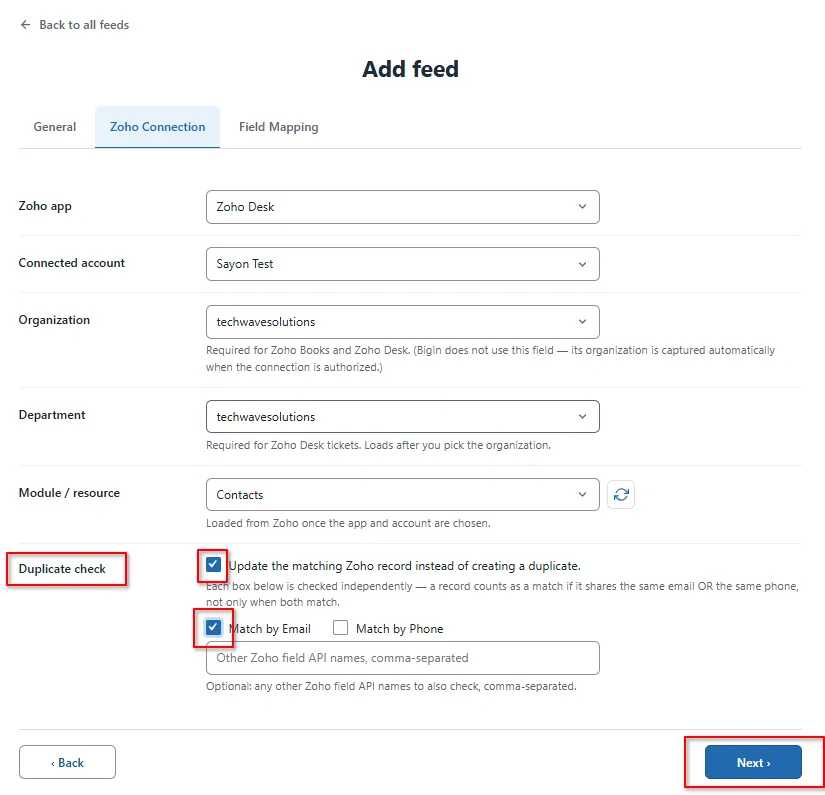
In the Duplicate Check field, you can check for duplicate records and update an existing record in Zoho if a match is found based on email, name, or other fields. Enable this option if you want to update existing records. Then, click Next.
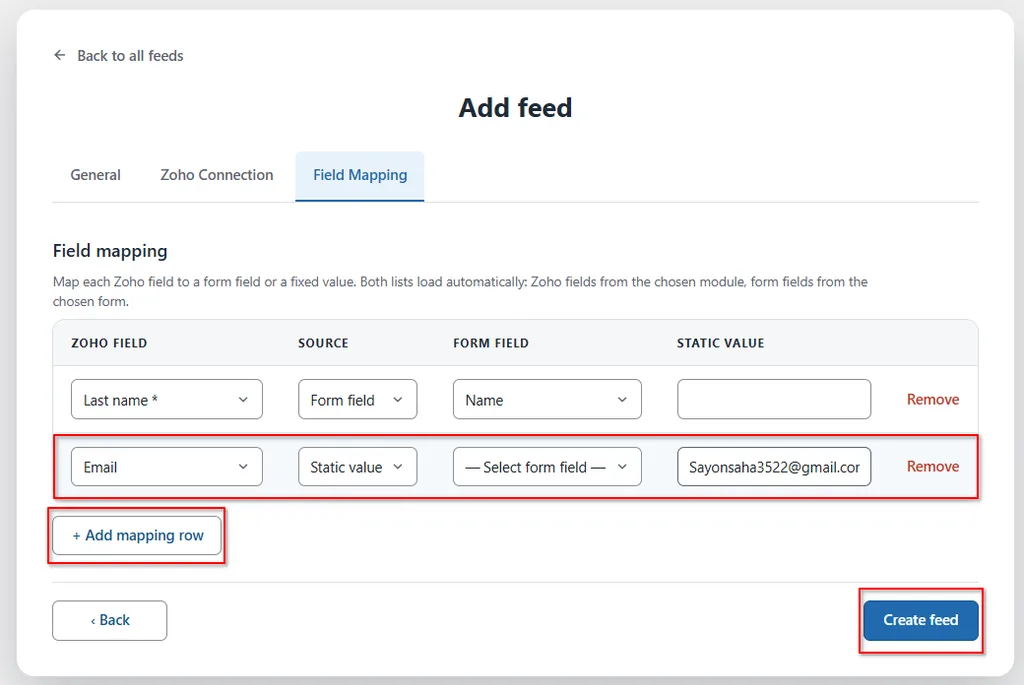
Field Mapping: Here, you need to map your form fields to the corresponding fields in the selected Zoho Desk module. Since we selected Customers/Contacts, the Contact Name field is required in Zoho Desk. Make sure to map your form’s Contact Name field to the corresponding Zoho Desk field.
The required fields may vary depending on the module you select, so make sure to map all required fields accordingly. You can also click the Add Mapping Row button to map additional form fields.
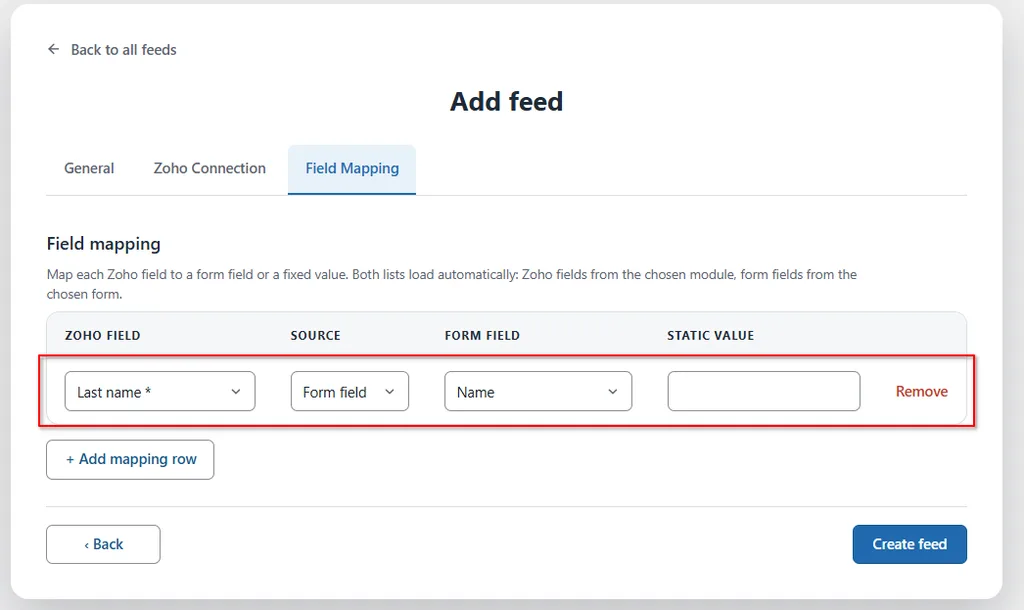
From the mapping options, you can also set a static field value if you prefer, instead of mapping it directly to a form field.
Once your necessary fields are mapped, click on the Create feed button.
Now, to check your connection, go and submit the form that you selected for this integration. Then you can see the status from the timeline.
Info
Every delivery, success or failure, is recorded on the FormBridge for Zoho→ Logs screen, with a one-click Resubmit option for anything that failed.
Note
- One feed always listens to exactly one WPForm. If you have two WPForms that should both go to Zoho Desk, create two feeds.
- Switching the Zoho app, account, or module after you’ve already mapped fields will clear the mapping rows below map fields again after changing any of these.
- To find the exact Zoho Desk field API names, go to FormBridge for Zoho→ Connections and use the Modules & fields button for that account.
