
Simply Schedule Appointments Zoho Integration: Send Appointment Data to Zoho
A Simply Schedule Appointments Zoho integration sends your appointment customers’ details to your Zoho apps automatically, with no copying and pasting. With FormBridge for Zoho, Simply Schedule Appointments is the trigger, and the captured data goes to Zoho CRM, Zoho Bigin, Zoho Books, Zoho Desk, Zoho Campaigns or Zoho Marketing Automation.
This guide shows how to select Simply Schedule Appointments as the trigger and name your feed, ready for the Zoho action.
Before you start
Check these before you create the feed.
How to set up Simply Schedule Appointments with FormBridge for Zoho
Follow these four steps to make Simply Schedule Appointments the trigger for your Zoho integration.
Step 1: Create a new integration feed
FormBridge for Zoho › All FeedsIn your WordPress dashboard, open FormBridge for Zoho, click All Feeds, then click + Add New Feed.
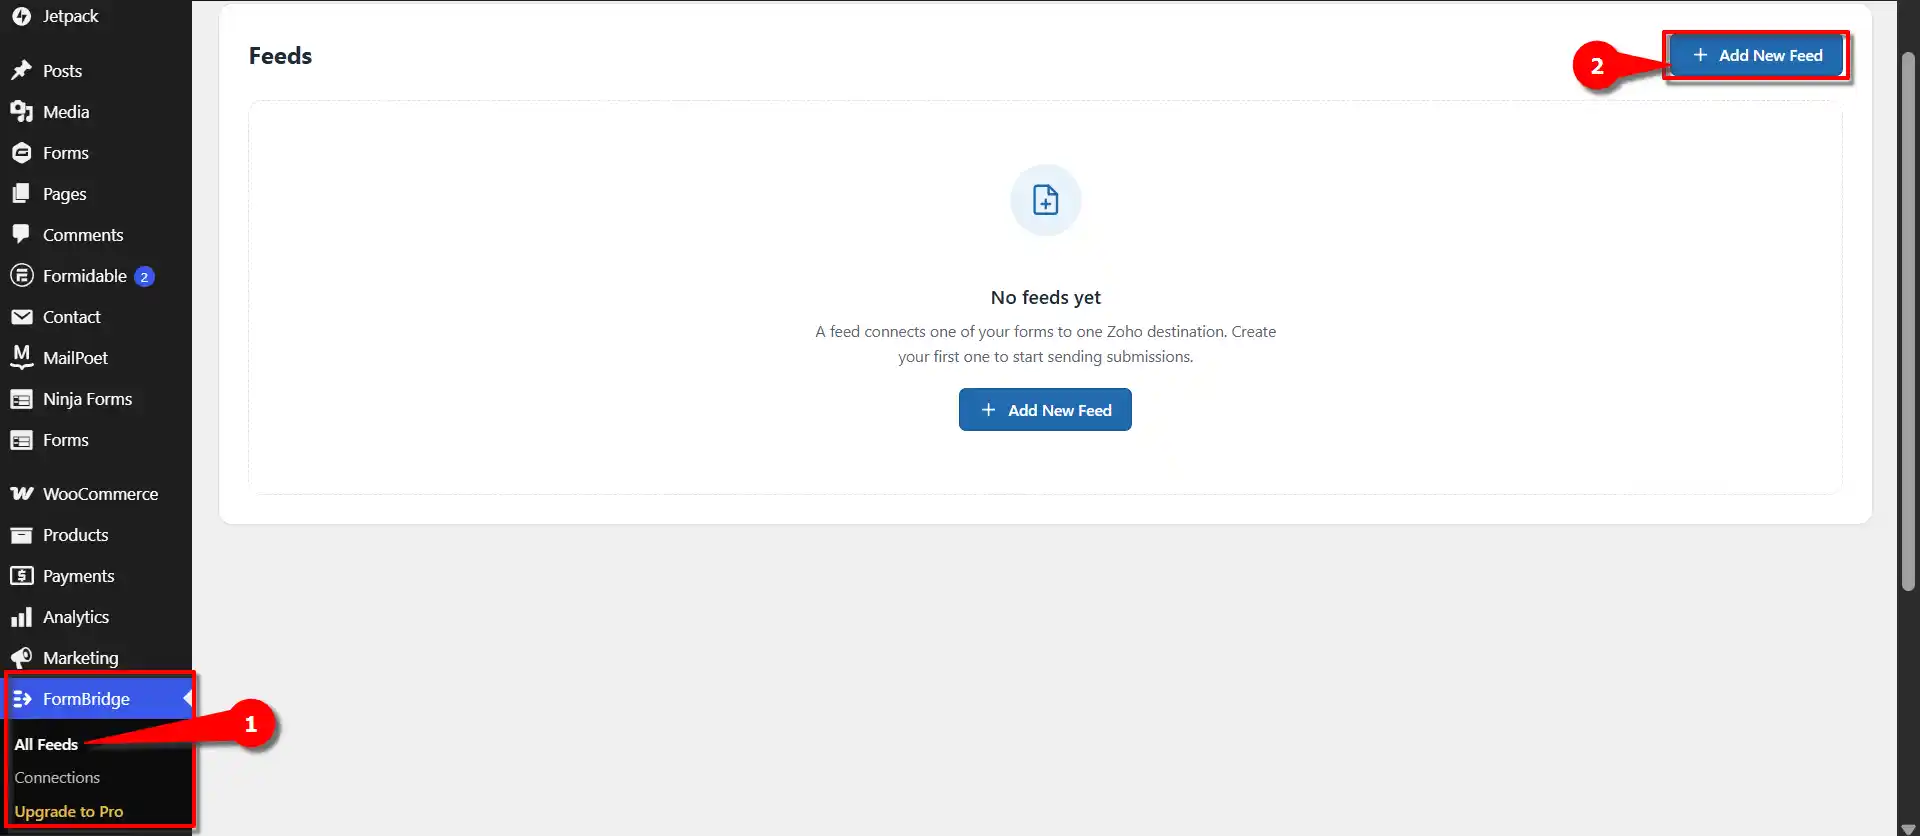
Open All Feeds and click + Add New Feed. Step 2: Select Simply Schedule Appointments as the trigger
New feed › Trigger appFrom the list of trigger apps, select Simply Schedule Appointments. The feed will now run on your appointment data instead of a form.
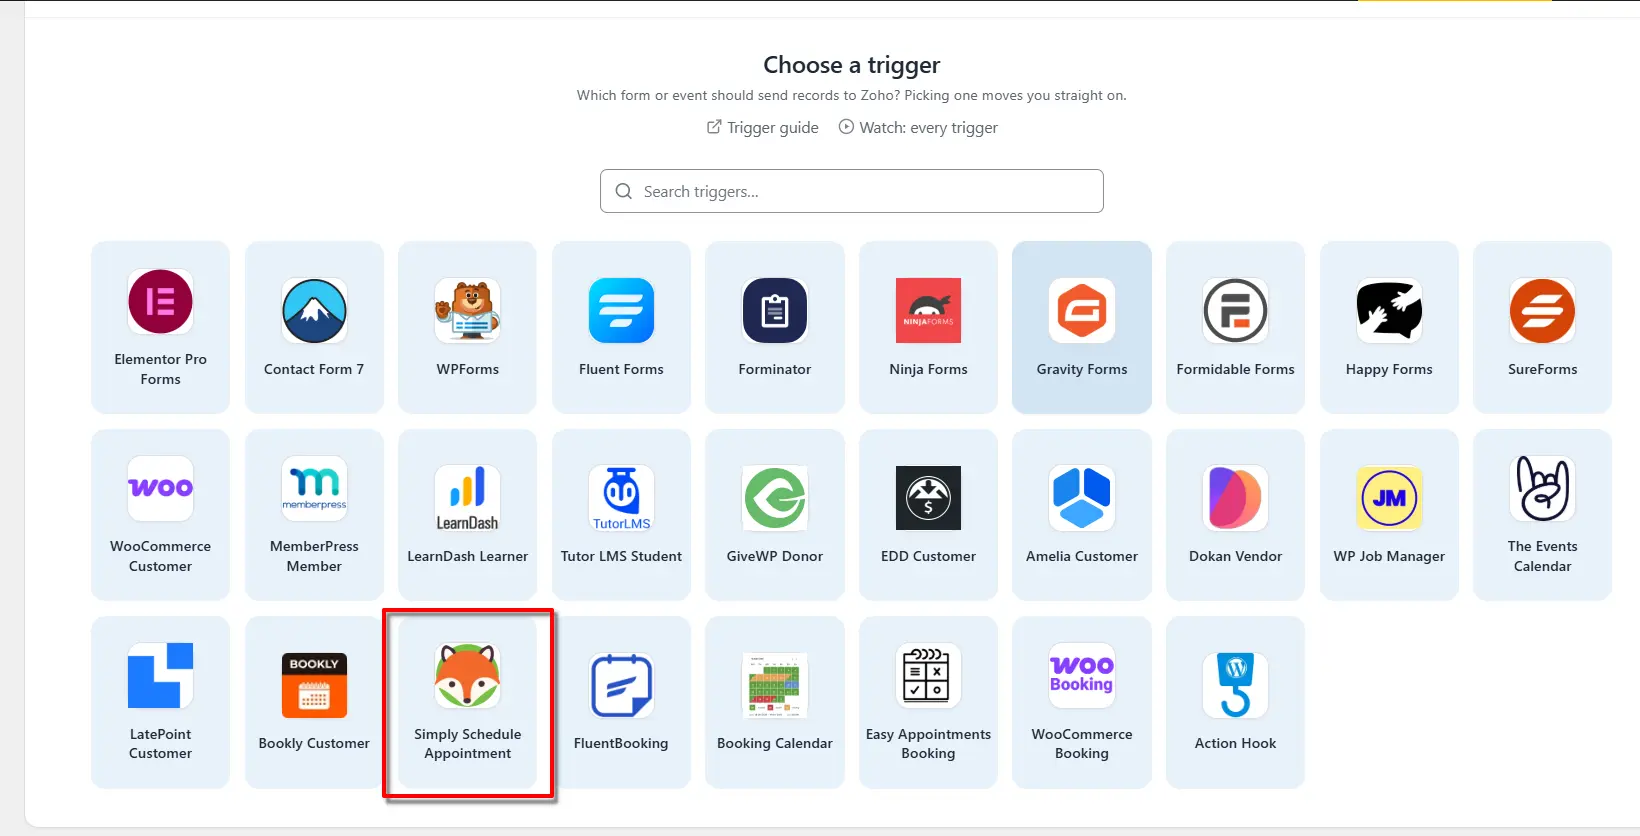
Select Simply Schedule Appointments from the trigger apps. Step 3: Enter a feed title
Name this feed › Feed titleOn the Name this feed screen, enter the required information. In the Feed title field, enter a name of your choice.
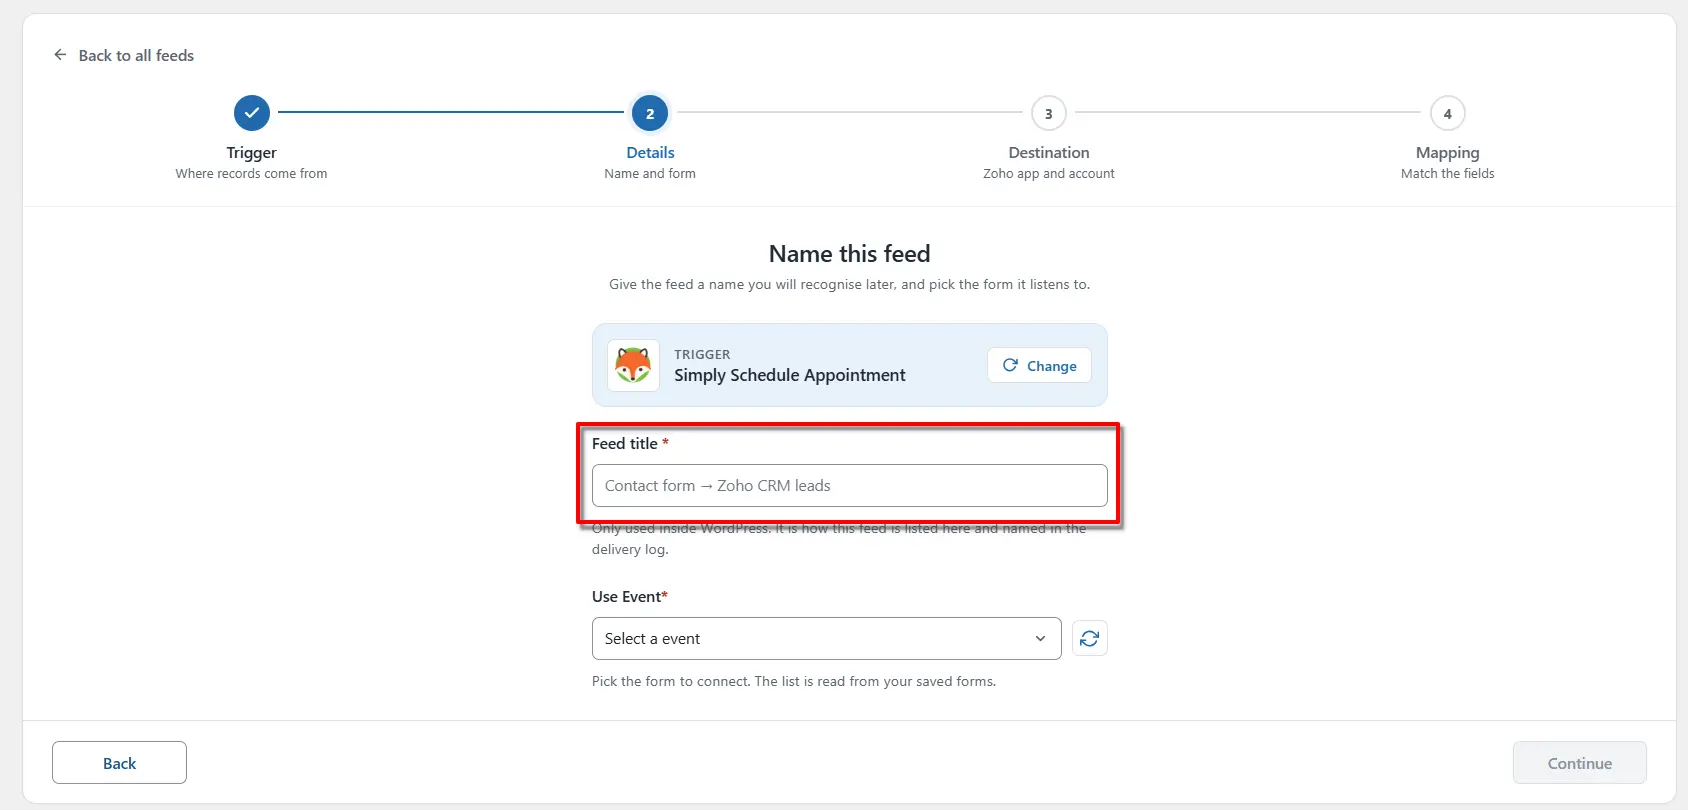
Enter a feed title you’ll recognise later. Step 4: Select your Event
New feed › EventFrom the provided dropdown menu, select the Event you want to connect with FormBridge for Zoho.For example Customer books an appointment then click Continue.
One feed, one destinationEach feed sends data to a single Zoho app. To send the same appointments to a second app, create another feed.
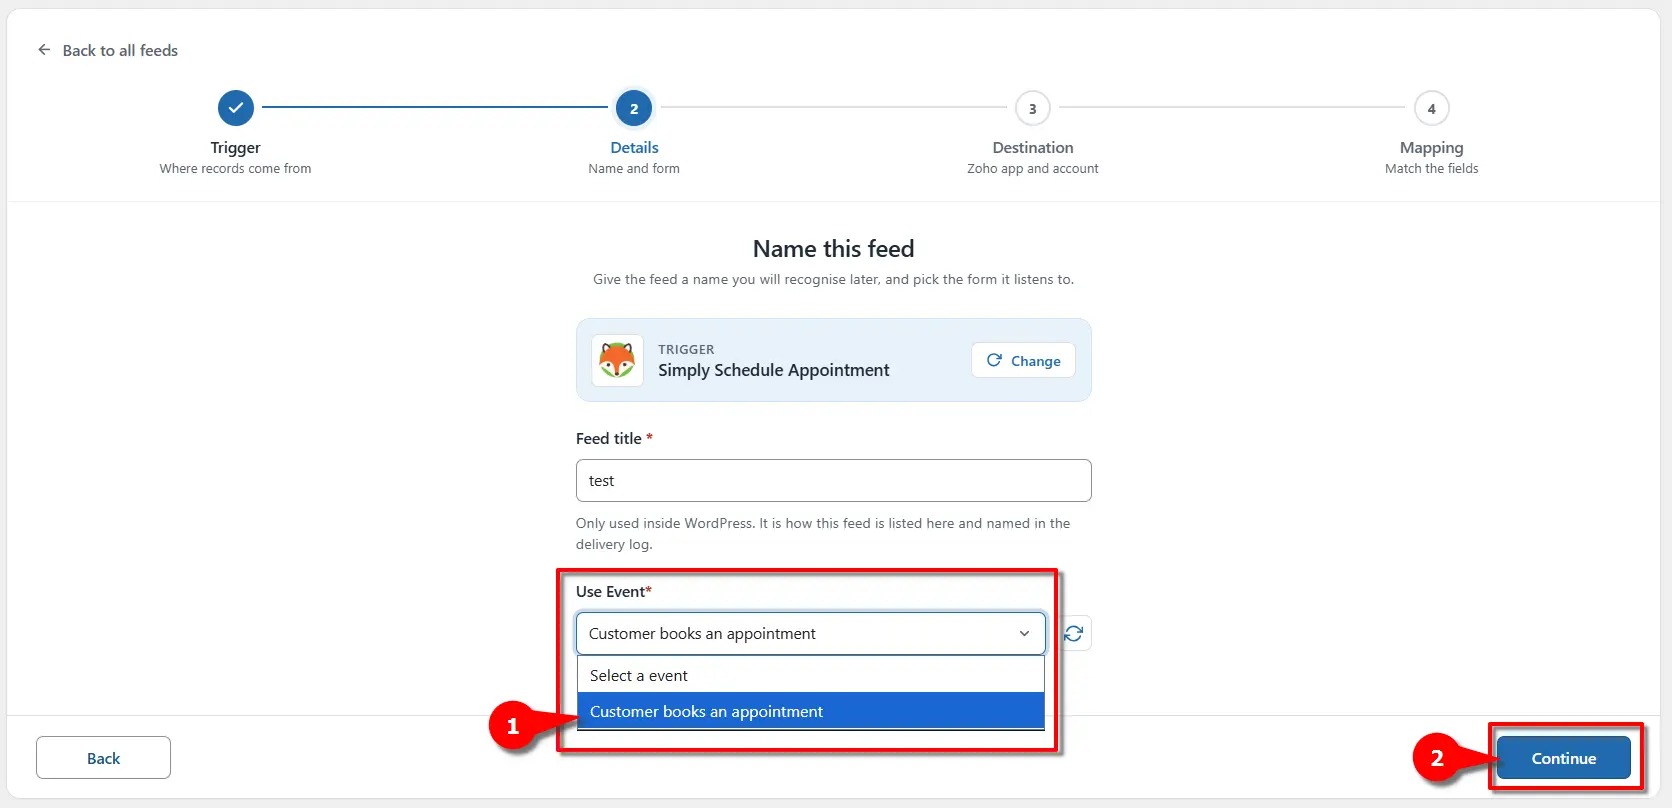
Choose your appointment event, then click Continue.
Next step: configure the Zoho action
After completing these steps, go to the Destination section and select the Zoho Action you want to connect with your selected Trigger. This allows FormBridge for Zoho to send your appointment data to the selected Zoho application automatically.
- Zoho CRM action guide
- Zoho Books action guide
- Zoho Desk action guide
- Zoho Bigin action guide
- Zoho Campaigns action guide
- Zoho Marketing Automation action guide
Frequently asked questions
Can I connect Simply Schedule Appointments to Zoho CRM?
Yes. Use Simply Schedule Appointments as the trigger and Zoho CRM as the action. Choose a module such as Leads or Contacts, then map your appointment details to the matching CRM fields.
Do I need a form plugin for this?
No. Simply Schedule Appointments is the trigger itself, so no separate form plugin is involved. Form plugins are only needed when the data comes from a form.
Can I send appointments to several Zoho apps?
Yes. Create one feed per Zoho app and select Simply Schedule Appointments as the trigger in each feed.
Do I need coding for the SSA Zoho integration?
No. FormBridge for Zoho is set up entirely from its settings screens. You select the trigger, pick a Zoho app and map the fields without writing any code.
How do I check that an appointment reached Zoho?
Book a test appointment, then open FormBridge for Zoho → Logs. Every delivery is listed with its result, and failed deliveries can be resubmitted.
Want the whole setup in one place? Read the complete WordPress to Zoho CRM guide, or email support@techwavesolutions.net for help.
